Okay, take a breath. Before you dive into your keyboard like a tech surgeon, let’s prep your workspace and make sure you’re not missing anything crucial. You don’t want to hit the midway mark and realize you’re missing your switch opener (been there, hated it).
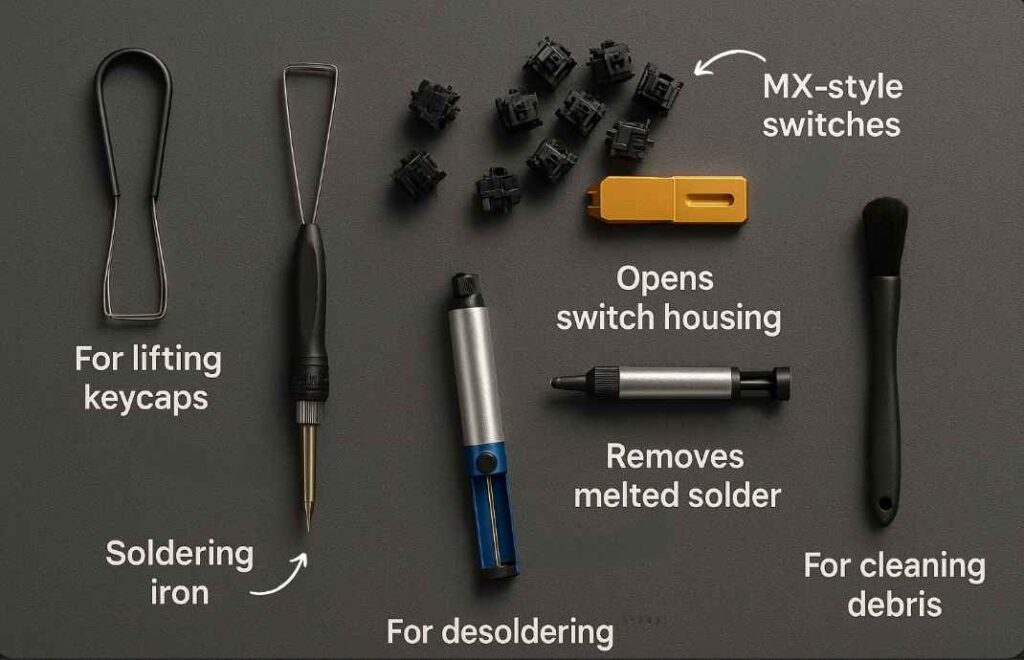
At the bare minimum, you’ll need:
- A keycap puller
- A switch puller or opener
- Your replacement switches
- (Optional but wise): A small brush and lube
- And if your board’s soldered? Soldering iron and desoldering pump
This little toolkit will make your job smooth and safe. Most hot-swap boards only need a gentle tug and push, but soldered ones are a bit more involved. We’ll go over both, don’t worry.
🔍 Knowing Your Keyboard Type (Hot-Swap vs Soldered)
Alright, time to pop the hood. But wait—you need to know if your board’s hot-swap or soldered. This changes everything.
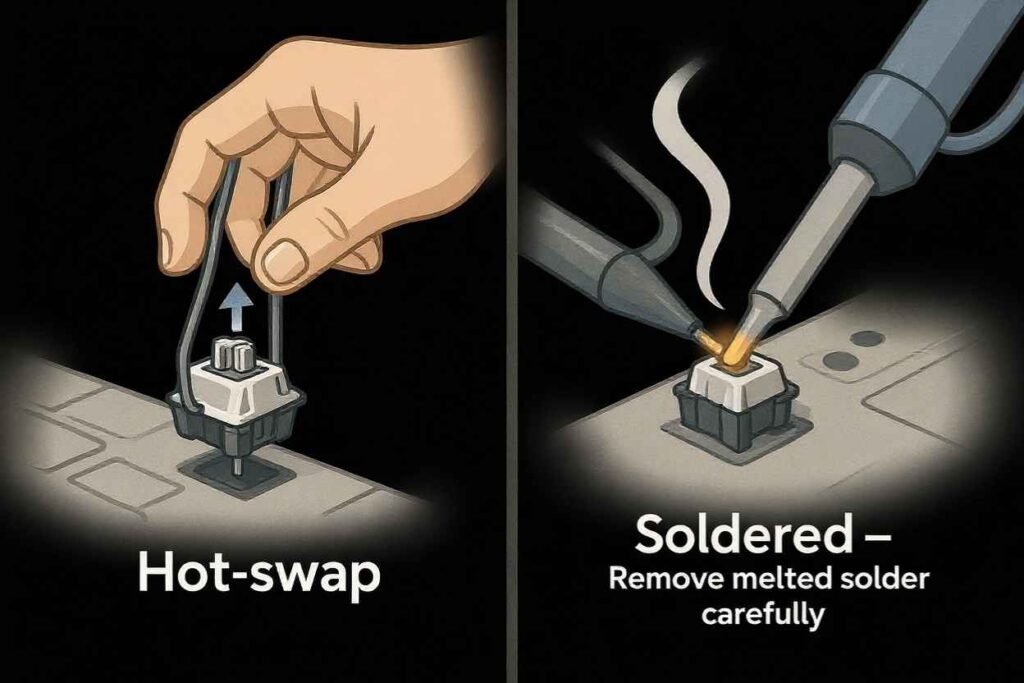
Hot-swap keyboards are plug-and-play. You literally pull the old switch out and pop a new one in. Easy peasy.
Soldered keyboards, on the other hand, need some heat. Each switch is attached to the PCB with melted metal. You’ll need to desolder each one to remove it.
How can you tell? Look online for your model specs, or gently pull a keycap and see if the switch can be wiggled out. If not, don’t force it—you might be staring at a soldered beast.
🔓 Removing the Keycaps
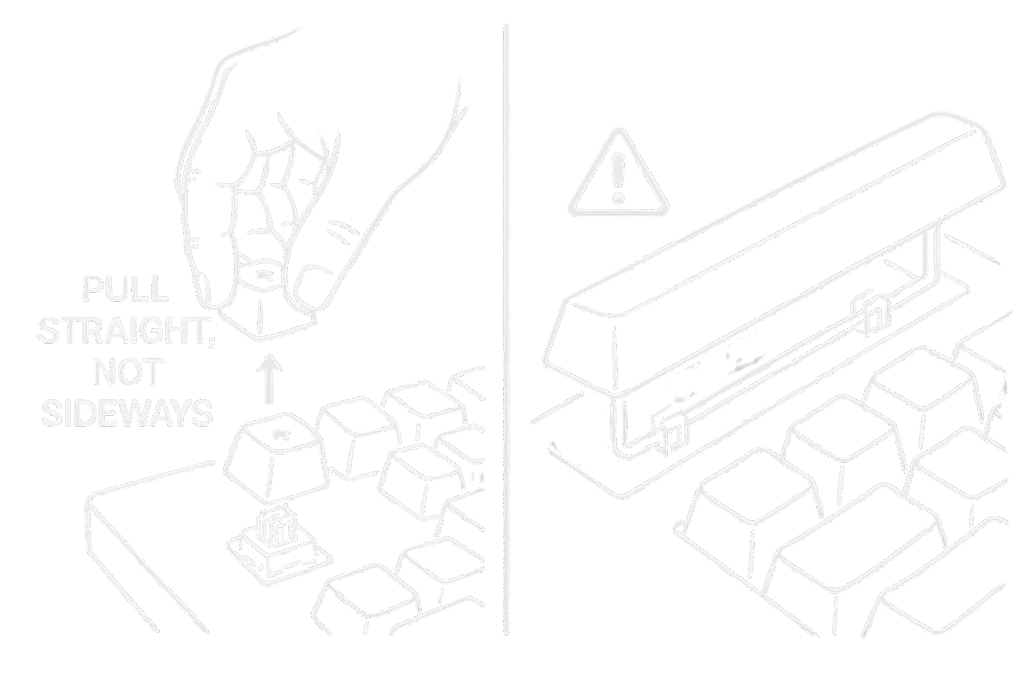
Now for the fun part. You get to pop all those beautiful keycaps off. It’s weirdly satisfying, trust me.
Use your keycap puller (wire ones are best) and tug straight up. Not sideways. That’s how legends are broken—or at least your switch stems. Do it gently but with purpose.
Put the caps in a bowl or tray so you don’t lose any. For larger keys like the spacebar, be careful—there are stabilizer wires under there. We’ll deal with those next.
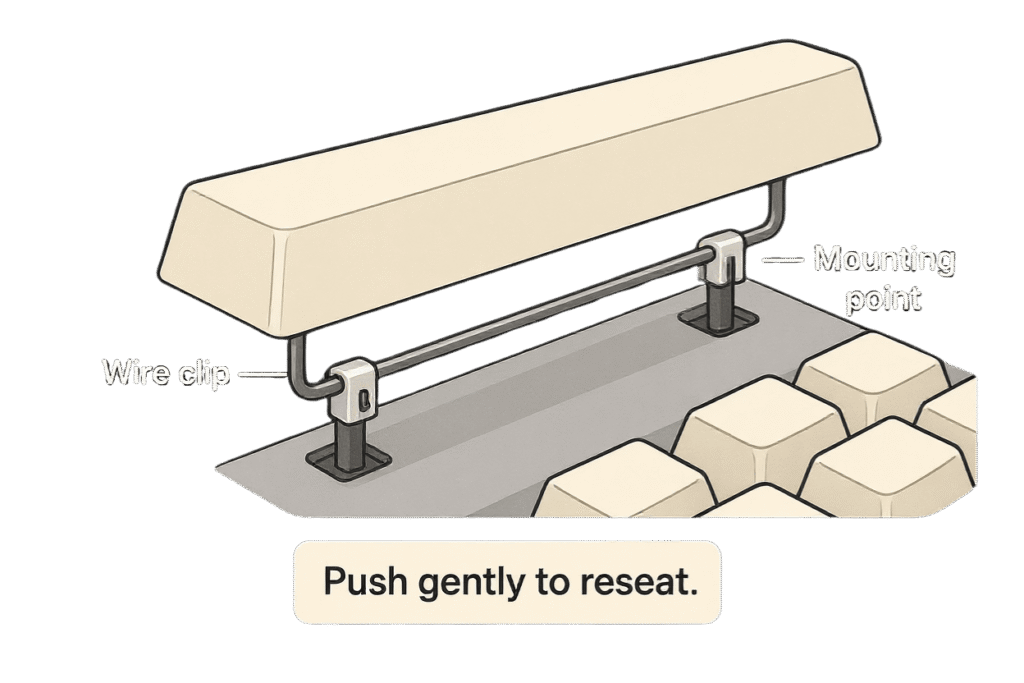
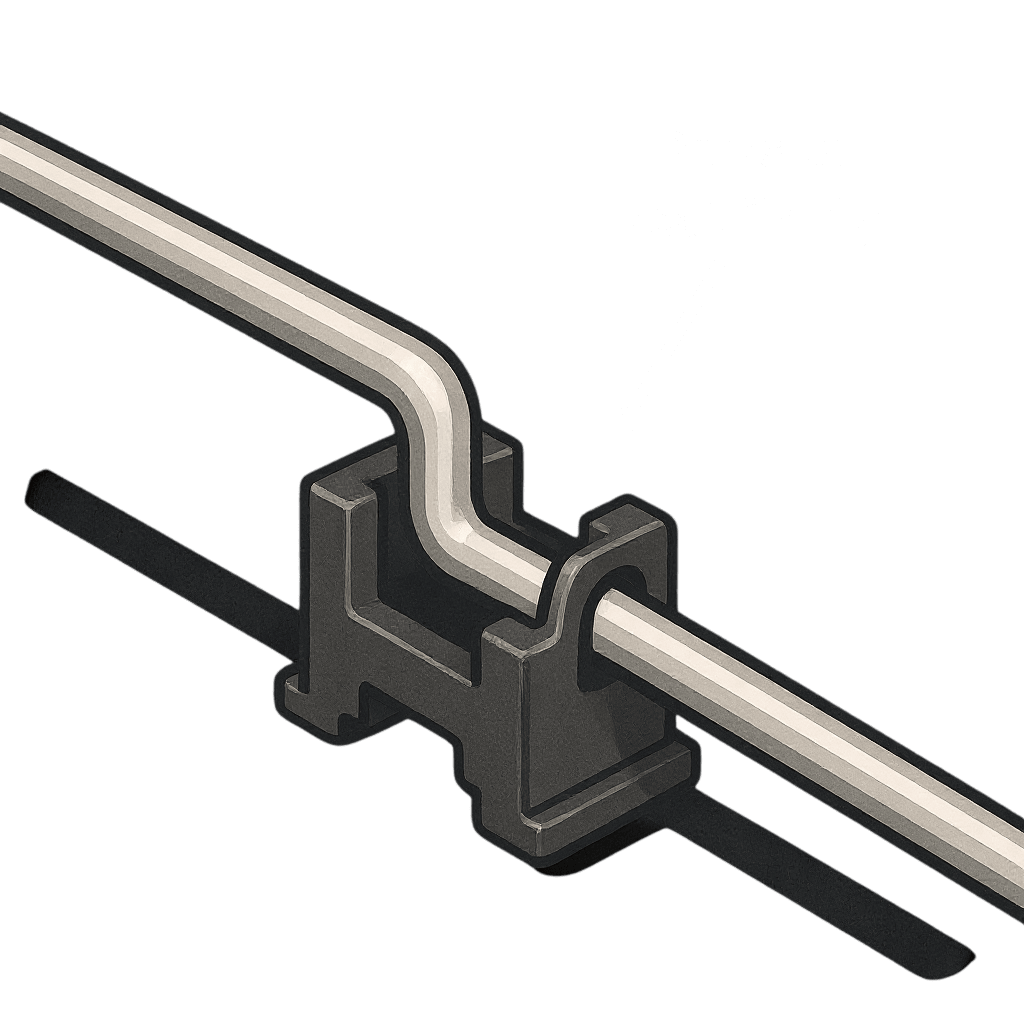
🧷 Dealing with Stabilizers on Larger Keys
Stabilizers are the unsung heroes of smooth spacebars and shifts. If you just rip a big key off, you could mess up the bar or worse—pop out the clip.
Slide the keycap off slowly and observe how the stabilizers are seated. Some clip in, some are wire-mounted. Make a mental note of how they’re arranged because you’ll need to get them back in later.
And yeah—sometimes, especially if it’s a budget board, you’ll need to give them a little nudge to sit just right when reinstalling. They’re picky like that.
🔄 Taking Out the Switches
With the keycaps gone, your switches are finally exposed. Time to evict the old tenants.
For hot-swap, just grab a switch puller, squeeze the sides, and pull up. You’ll feel a little resistance, then it pops out.
If it’s a soldered keyboard, warm up your soldering iron. Apply heat to each pin while using a desoldering pump to suck up the liquid solder. Take your time. Rushing leads to PCB damage or burns.
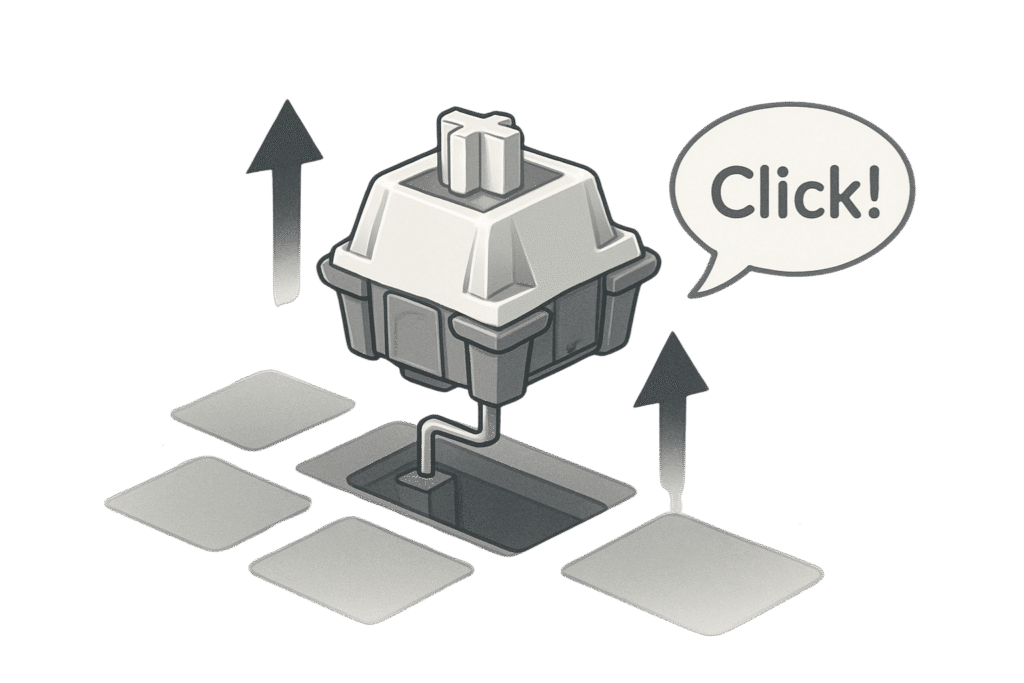
🧹 Hot-Swap Switch Removal
This one’s a dream. Take your switch puller, grip the top and bottom tabs of the switch, and pull straight up.
You’ll hear a “click” as it comes loose. Repeat this for each switch. If you feel one is stuck, don’t yank—check the pins or alignment.
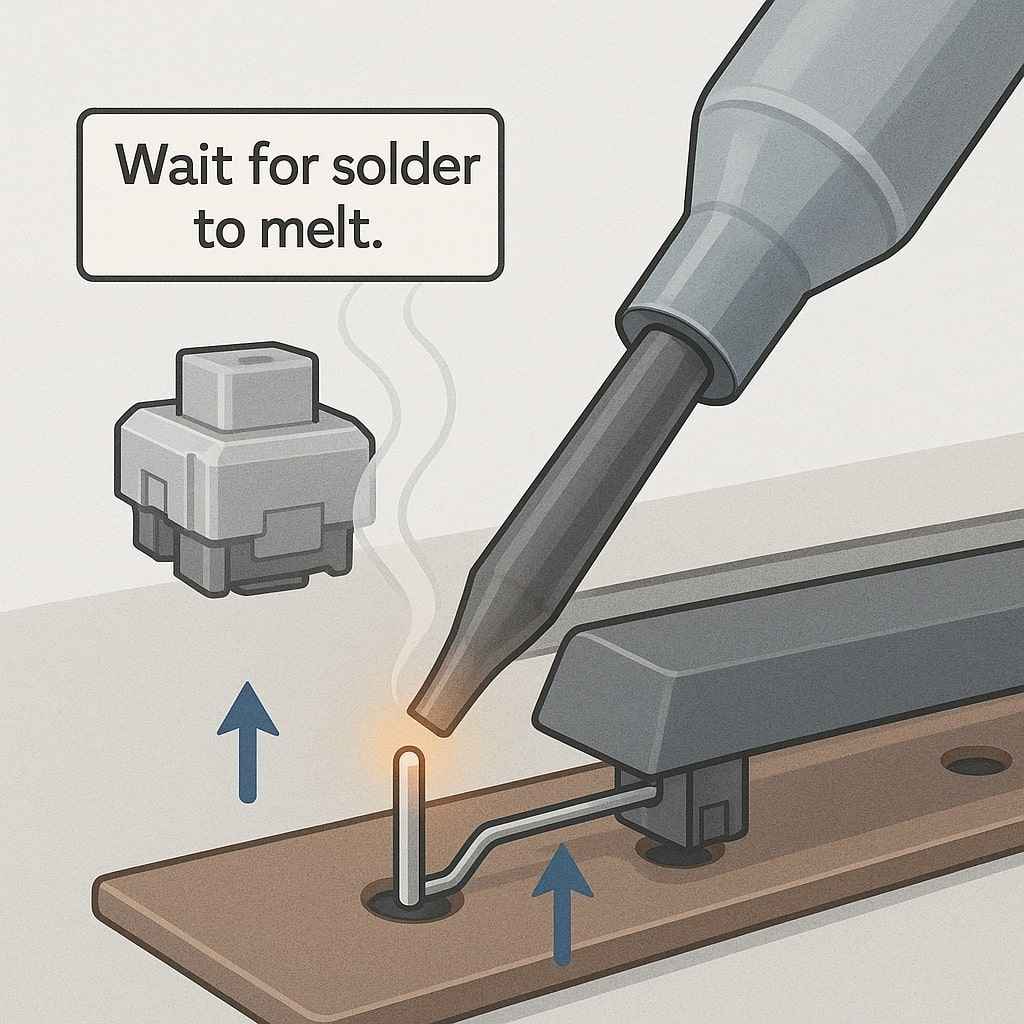
🔥 Desoldering for Soldered Boards
This takes patience. Heat the solder point with your iron, press the desoldering pump trigger as the solder melts, and it’ll suck the liquid up.
After clearing both pins, gently remove the switch. If it won’t budge, check if solder remains.
Take breaks. You’ll need steady hands and calm energy for this part.
🧼 Prepping the New Switches
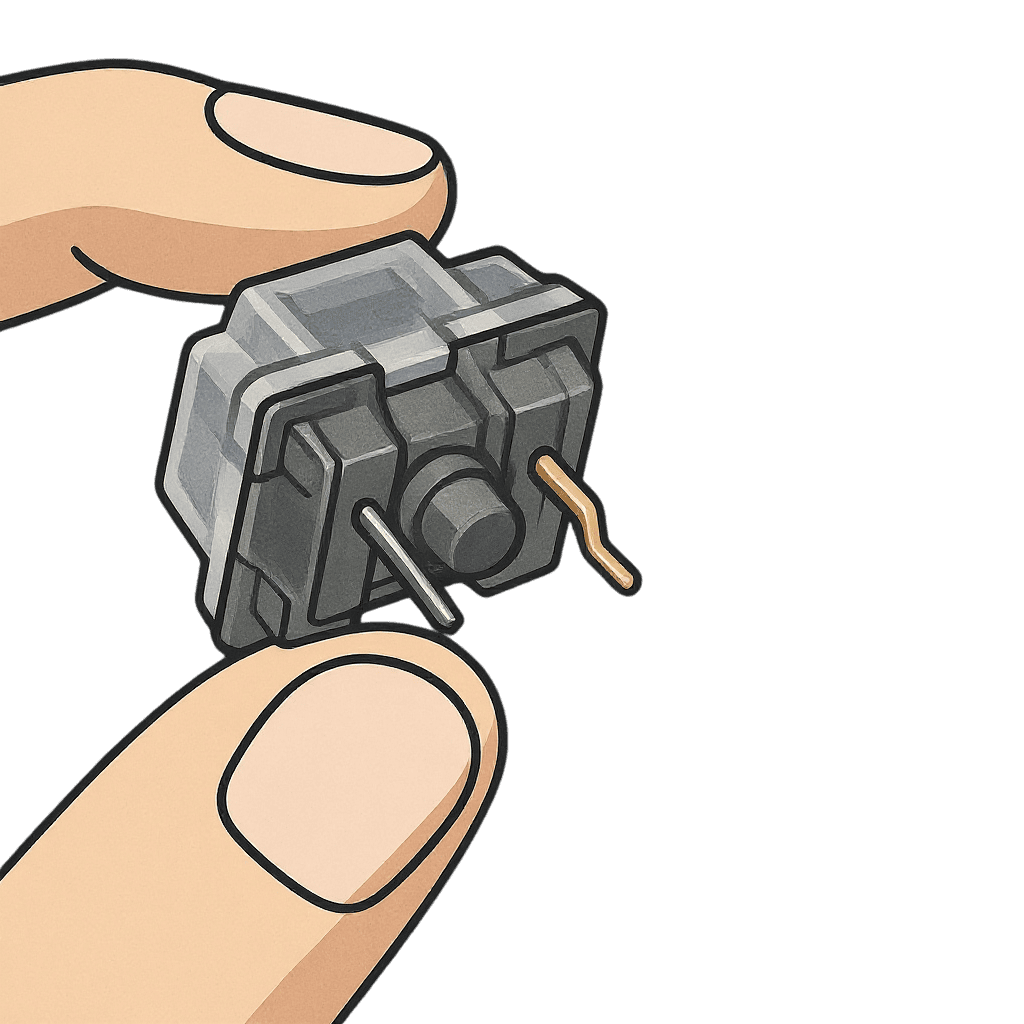
Before you pop in the new switches like candy into a dispenser, do a quick check.
Make sure none of the pins are bent. If they are, straighten them gently with tweezers.
If you’re feeling fancy, now’s a good time to lube them. A bit on the spring and stem rails will make your typing buttery smooth. Optional, but once you go lubed, it’s hard to go back.
🔍 Testing for Faulty Pins
Hold each switch up to the light. Bent pins? Fix them now. No one likes the sound of a dead key when you’re in the zone.
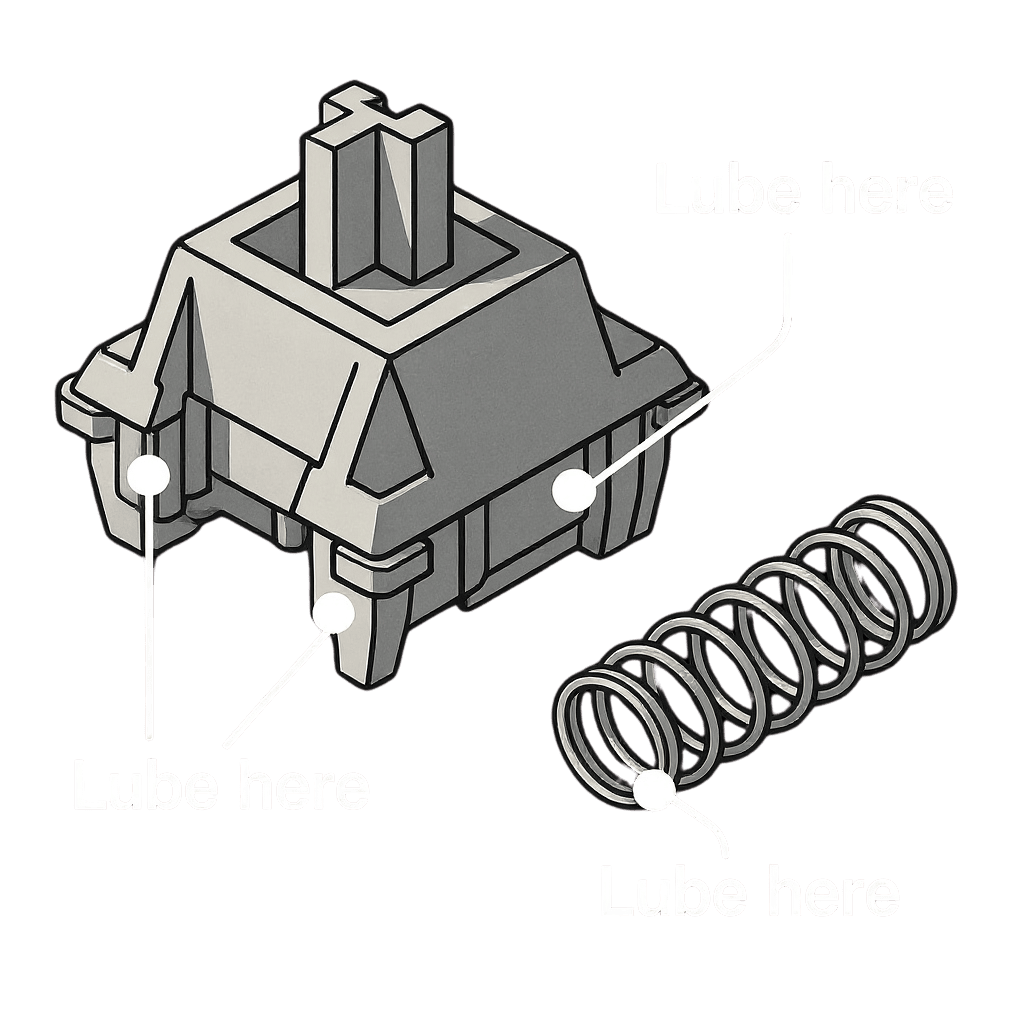
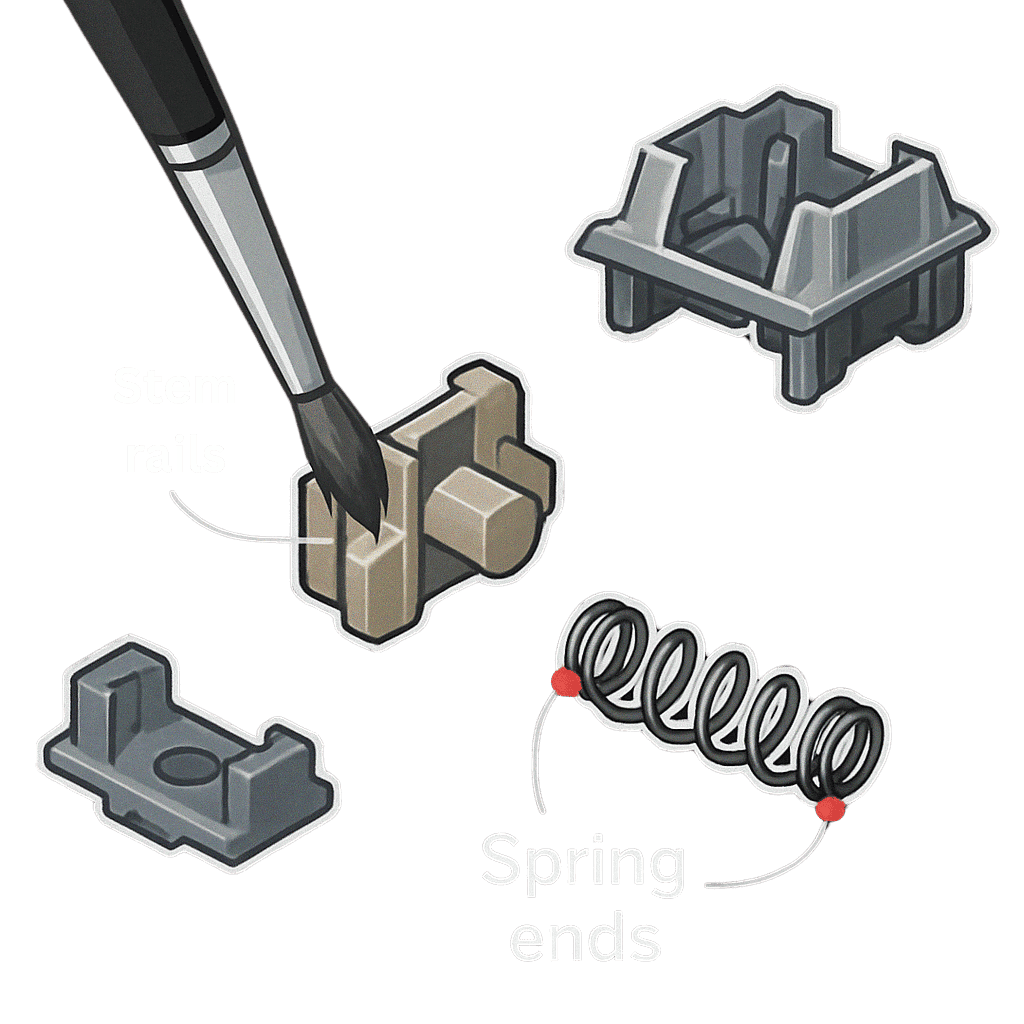
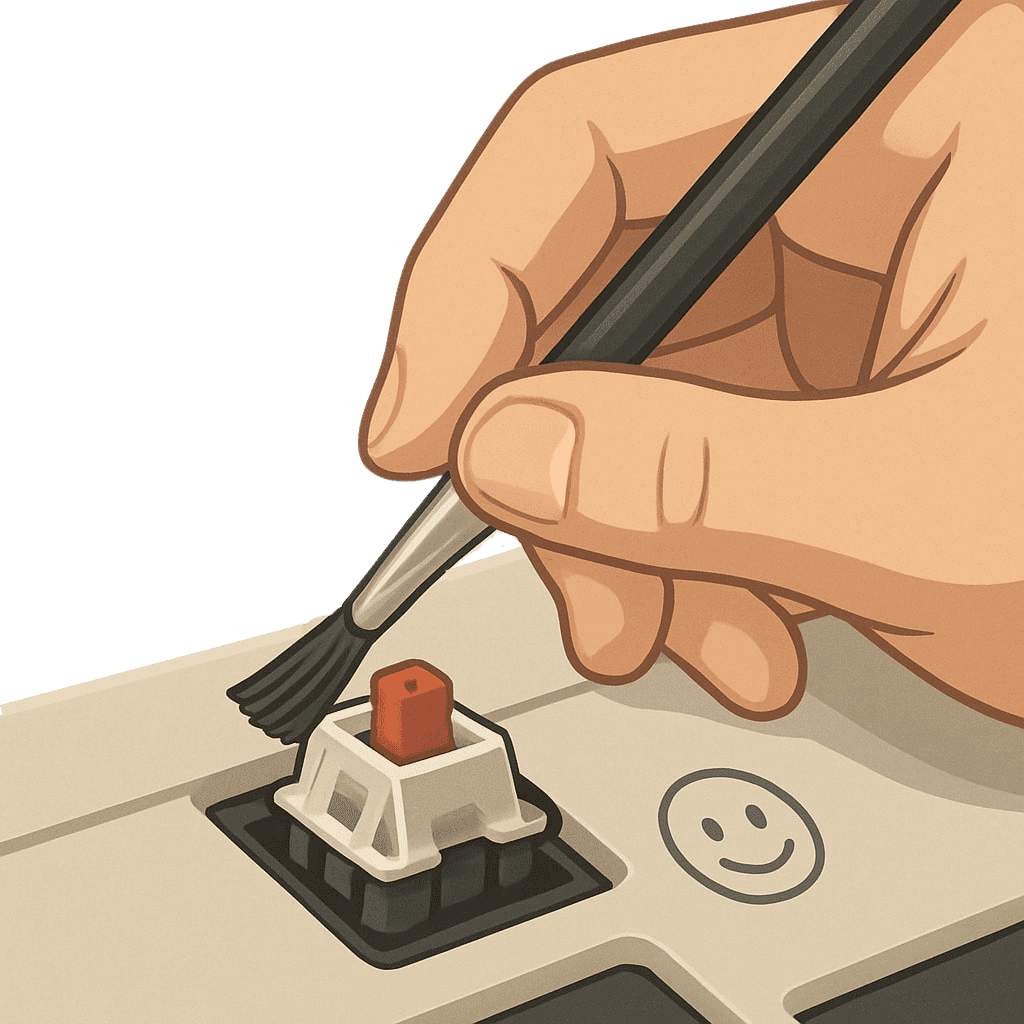
🧴 Lubing the Switches (Optional, But Lovely)
Use a fine brush and apply a bit of lube to the contact points: rails, spring ends, stem legs.
Go light—you’re enhancing, not drowning them.
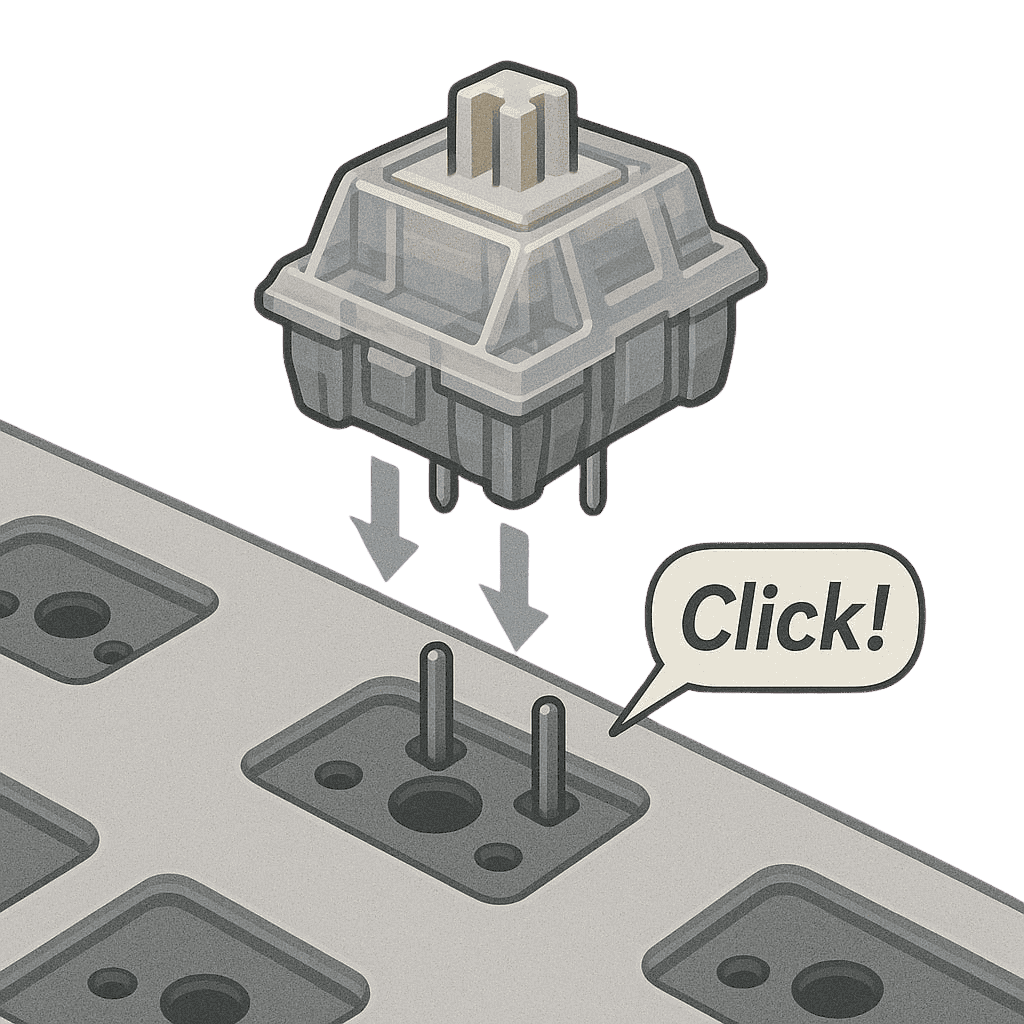
🔩 Installing the New Switches
Align the pins with the socket holes and press firmly but carefully. You want to hear that satisfying click. Misaligned pins can bend—and nobody wants that.
Start from one row and work across to keep things neat.
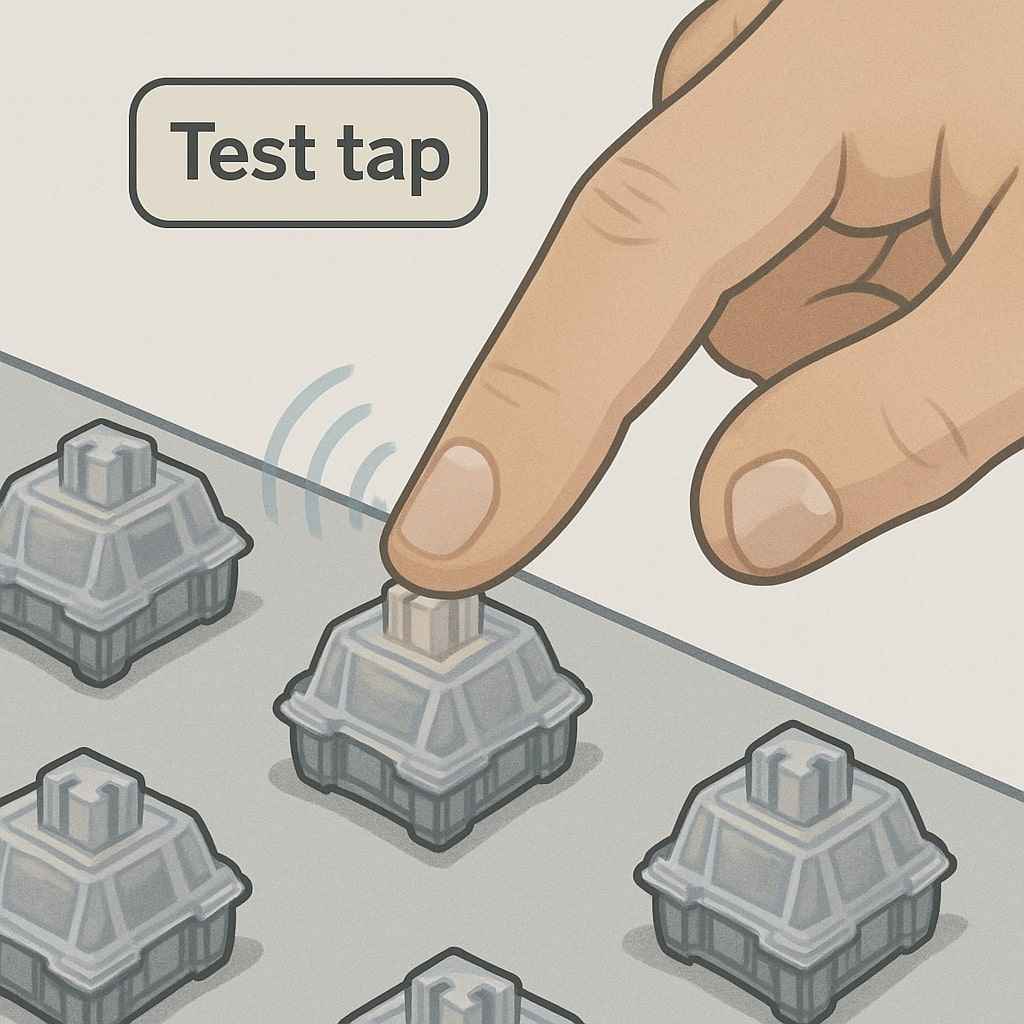
🧭 Checking Alignment & Sound
After inserting a few, tap them. Listen. They should feel firm, not shaky. If one feels weird, it might not be seated right.
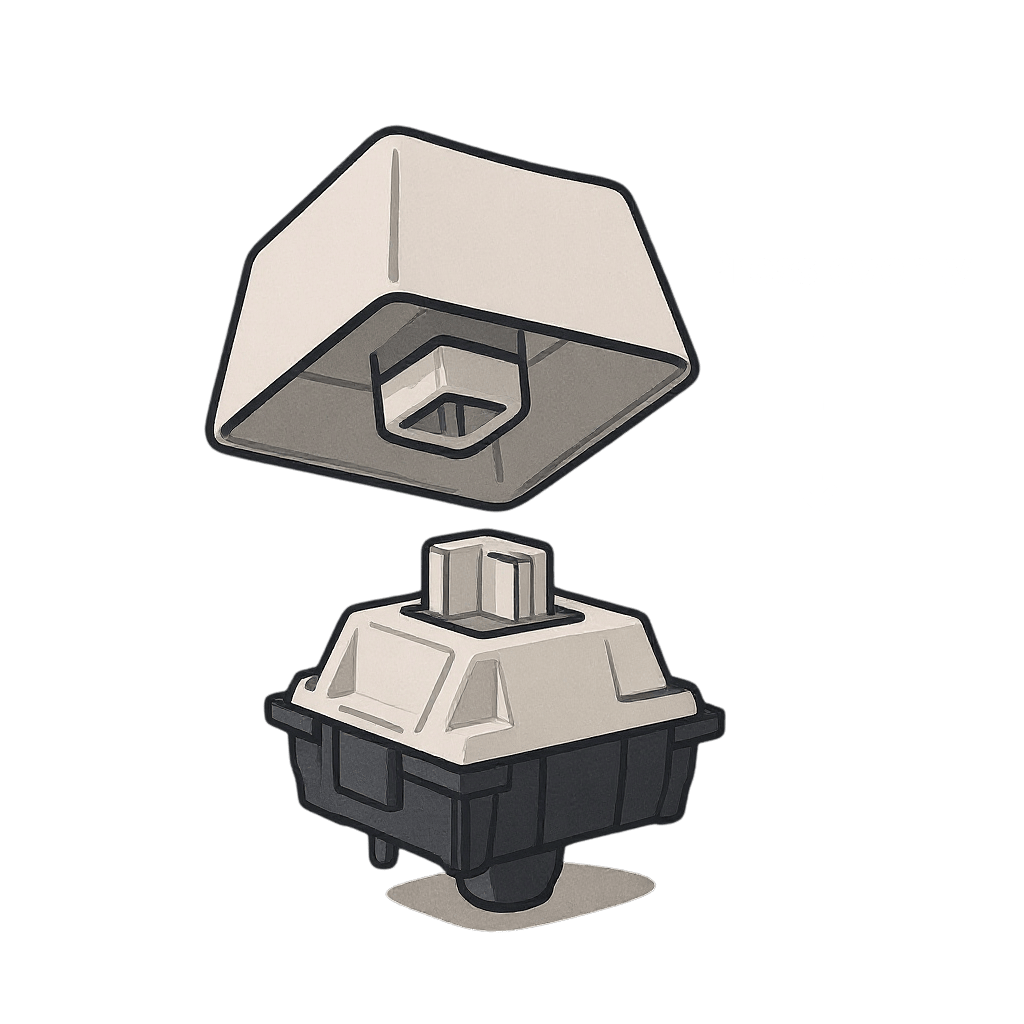
🔁 Reattaching Keycaps
You’re almost there—just re-dress your keyboard.
Push each keycap straight down. Don’t twist or slam. Just firm pressure until it clicks onto the stem.
✨ Ensuring Stabilizers Are Snug
Spacebar feel mushy? Shift bouncing? You might need to reseat the stabilizer. Use a finger or tool to press the wire gently into place.
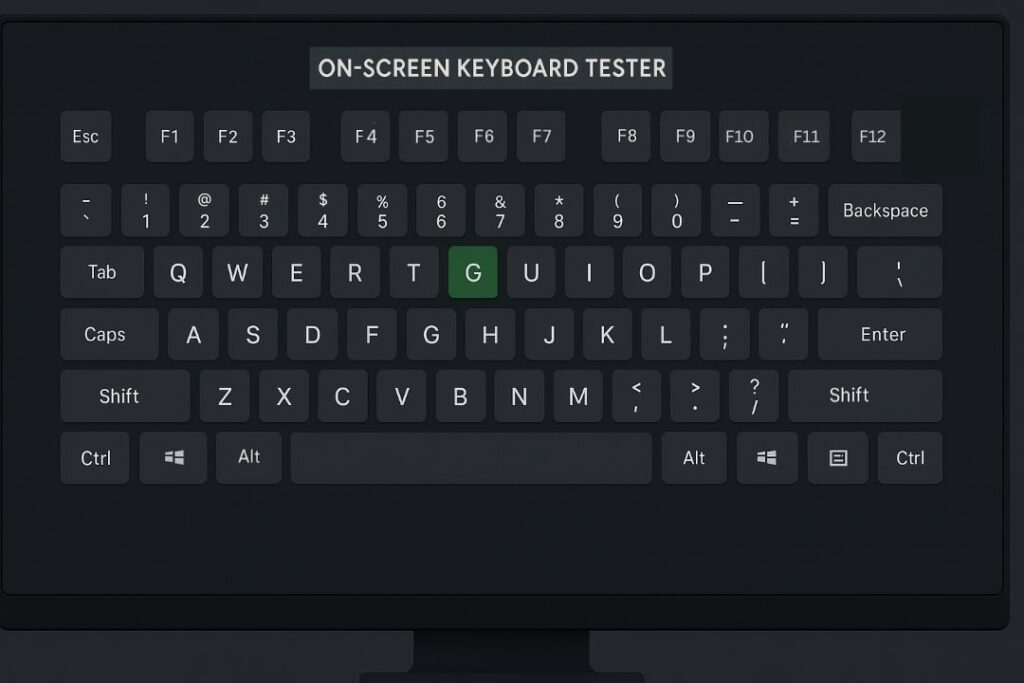
✅ Final Testing and Feel Check
Time to fire it up. Plug in the keyboard and test every key. Use a free online tester to see if all your new switches register correctly.
🎯 Fine-Tuning for Feel
Sometimes you’ll want to tweak how a switch feels. A tiny bit of extra lube or a switch film can make a difference.
Want the full, detailed playbook for swapping switches without a hitch? Dive into our guide on How to Install Switches On Hot‑Swap Keyboards.