Many people think of keyboard keycaps and even keyboards in general as just tools you type on. But mechanical keyboards offer a world of customization, letting you change how they look, feel, and sound. Keycaps play a huge role in that.
In today’s customization era, you don’t have to settle for the standard caps that come with your board. You can design and build your own keycaps to match your style. In this guide, we’ll walk through the basics of how to make your own keycaps, from tools and materials to the actual process, so you can give your keyboard a truly personal touch.
Tools Checklist
To make custom keycaps, you’ll need a few basic tools for both designing and manufacturing. The essentials usually include a two-part mold (commonly used for resin casting), a mold release agent so the caps don’t stick, colorants to give your keycaps personality, and some simple tools for mixing and pouring the resin.
Depending on the style you want, you can also add extras like glitter, metallic flakes, or dyes to create unique effects. Having a clean, flat workspace is just as important, since resin can get messy quickly. With the right setup, the whole process becomes much smoother and a lot more fun.
Steps
1. Choose a Material
The first step in making custom keycaps is choosing the material. You’ll need to decide whether you want to use resin, clay, or 3D printing. Resin is the most popular choice because it’s durable, long-lasting, and captures fine details really well. Clay can be fun for one-of-a-kind, handmade designs, while 3D printing gives you the freedom to create precise shapes and complex patterns.
Think about the look and feel you want for your keycaps. If you want something glossy and professional, resin is the way to go. If you like sculpted, artsy designs, clay might be a better fit. And if you want highly customized shapes with accuracy, 3D printing opens endless possibilities.
2. Create or Get a Mold
You’ll need a mold to shape your keycap. The easiest way is to buy pre-made silicone molds designed for keycaps. These are reliable and give you consistent results. If you want something more unique, you can make your own mold by casting silicone around an existing keycap. This way, the mold will perfectly capture the shape and details you want.
A good mold is the foundation of your design. If it’s made well, your keycaps will come out clean and professional-looking. If it’s rushed or uneven, the final result will show those flaws. So take your time at this stage it pays off later.
3. Prepare and Pour
Start by mixing your resin (or the material you’ve chosen) according to the instructions. If you want color, you can add dyes, pigments, or even glitter to make your keycap stand out. Stir slowly to avoid air bubbles, since they can ruin the finish of your cap.
Once it’s ready, carefully pour the mixture into your mold. Pouring too fast can trap air or cause spills, so take your time and make sure the mold is filled evenly. You can gently tap the mold afterward to help release any bubbles that may have formed.
This step is where your creativity really shines every color choice, swirl, or sparkle you add will make your keycap one of a kind.
4. Cure and Remove
Allow the resin to fully cure. The curing time depends on the type of resin you’re using, but it usually takes several hours or even overnight. Don’t rush this step, because removing the keycap too early can cause warping or breakage.
Once the resin has hardened, gently remove the keycap from the mold. If it feels stuck, flex the mold slightly rather than pulling too hard you don’t want to damage the cap.
After it’s out, check for rough spots or sharp edges. Use fine sandpaper or a small file to smooth them out so the keycap feels comfortable to use and fits properly on your switch.
This finishing step is what gives your keycap a polished, professional look.
5. Finish and Test Fit
Finally, give your keycap a nice finish. You can polish it to make it smooth and shiny, or add paint details if you want a more creative touch. Some people even add a clear coat to protect the colors and give it extra durability.
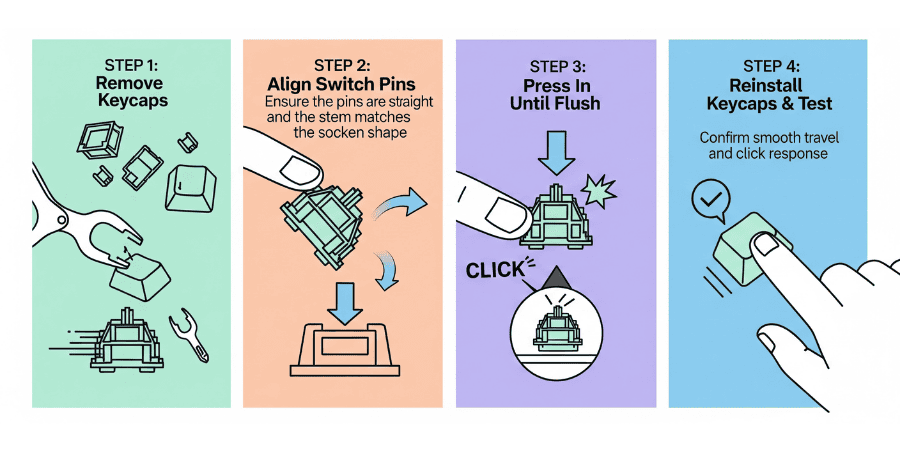
Once you’re happy with the look, place the keycap on your switch to test the fit. It should sit firmly without wobbling or falling off. If it feels too tight, gently sand the inside of the stem until it slides on smoothly.
And that’s it you’ve created your own custom keycap from scratch. It’s a fun process that not only personalizes your keyboard but also gives you something truly one-of-a-kind to type on.
If you’re also looking to refresh your switches for that ultra‑smooth feel, don’t miss our hands‑on tutorial on How to Change and Lube Mechanical Keyboard Switches.


