Building your own keyboard can be a really fun and rewarding process. If you’ve ever thought about making one from scratch, it’s not as hard as it might seem. With the right tools, parts, and a little patience, you can put together a keyboard that feels and sounds exactly the way you want.
To get you started, I’ve gathered some helpful information and steps that will guide you through the basics. From picking switches and keycaps to choosing the right case and stabilizers, everything comes together piece by piece. The best part is that you’re in full control you get to decide the look, feel, and sound of your board.
So, if you’re ready to dive in, let’s walk through the essentials you need to know before starting your first custom build.
Getting to Know the Parts
Before you start building, you need to gather the main parts that make up a mechanical keyboard. Each piece has a role to play, and together they shape the feel, sound, and look of your final build.

The case is the outer shell of the keyboard. It holds everything inside and also affects the look and feel of your setup. Cases can be made of plastic, aluminum, or even wood, and each material changes the weight, durability, and sometimes the sound of your board.

The PCB is the brain of your keyboard. It’s where the switches are mounted, and it registers each key press. Some PCBs are hot-swap (easy to change switches without soldering), while others are soldered (permanent but stable connection).

The plate sits on top of the PCB and helps mount the switches. It also affects typing feel and sound. Plates can be made of different materials like aluminum, brass, or polycarbonate, each giving a different typing experience.

Stabilizers are used under larger keys like the spacebar, Enter, and Shift. They keep the keys steady and prevent wobbling or rattling when you press them. A good set of stabilizers makes a big difference in sound and feel.
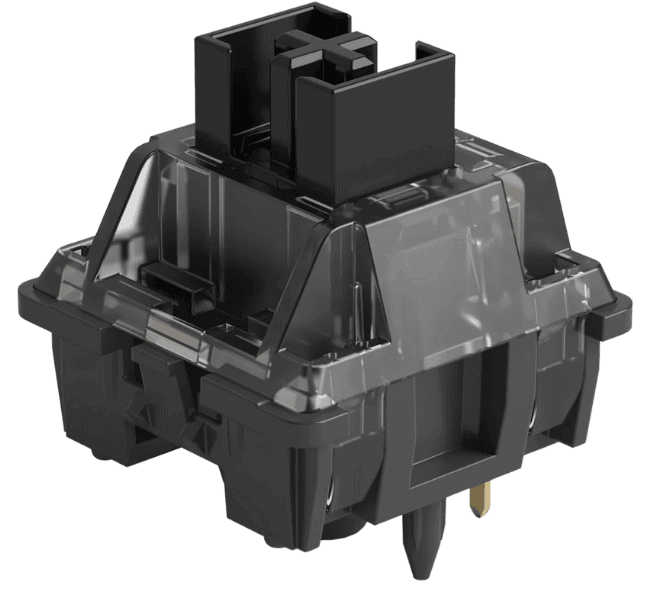
Switches are the heart of the keyboard and determine how it feels to type. You can choose between linear, tactile, or clicky switches depending on your preference. This is where customization really shines.

Finally, you’ll need keycaps. They go on top of the switches and give the board its personality. Choose keycaps based on both your typing comfort and the aesthetic you want for your setup.
Choosing a Keyboard Layout
One of the first things to decide when building a keyboard is the layout. This simply means how many keys your keyboard has and how they’re arranged. The most common layouts are:
- 100% (Full-size): Includes all keys function row, number pad, arrows, and navigation keys. Great for people who need every key but takes up the most desk space.
- 75%: A more compact version that keeps the function row and arrows but skips the number pad. Saves space while still being practical.
- 70% / TKL (Tenkeyless): Similar to 75% but without the number pad and sometimes with fewer keys overall. A good balance between size and functionality.
- 65%: Drops the function row and some navigation keys but keeps the arrow keys. A popular choice for smaller desks.
- 60%: The most compact option, removing the function row, arrow cluster, and navigation keys. Perfect if you want maximum space for your mouse, but it takes time to get used to.
When choosing your layout, think about how much desk space you want to save and which keys you actually use every day. Gamers often prefer smaller layouts for extra mouse space, while office users or number-crunchers stick with larger ones.
Tools You’ll Need for Building a Keyboard
If you’ve already chosen your parts and decided on a layout, the next step is gathering the tools. Having the right tools makes the build smoother and helps avoid mistakes. Here’s a complete list of what you’ll need:
- Precision screwdriver kit – for opening and securing screws in the case and PCB.
- Keycap puller – to safely remove and install keycaps.
- Switch puller – especially if you’re using a hot-swap board, this tool makes removing switches easy.
- Switch opener – to open switches for lubing or modding.
- Stem holder or tweezers – for handling tiny switch parts without losing them.
- Lubricants (Krytox or Tribosys recommended) – for switches and stabilizers to improve sound and feel.
- A few small brushes – to evenly apply lube to stems, springs, and housings.
- Stabilizer clipping/cutting tool – useful if you want to mod stabilizers.
- Soldering kit (iron, solder, and pump) – only needed if your PCB is soldered, not hot-swap.
- Desoldering braid or pump – for removing switches if you make a mistake on soldered boards.
- Anti-static mat or wrist strap – to keep components safe from static electricity.
- Small container or tray – to hold screws and tiny parts so nothing gets lost.
Optional but nice to have:
- Switch films – for reducing wobble in switches.
- Foam – for sound dampening inside the case.
- Painter’s tape – for mods like the tape mod to change sound profile.
With this setup, you’ll have everything needed to build, mod, and maintain your custom keyboard.
Steps
1. PCB
The first step is testing your PCB before moving on to the next stages. This is important because you don’t want to fully assemble your keyboard only to find out later that something isn’t working. To do this, open the VIA app (or VIAL, which is another option). Both apps allow you to check if your PCB is functioning correctly.
When testing, plug in your PCB, press each switch position using tweezers or a metal object, and confirm that the keys register on the screen. If any spots don’t respond, you’ll know there’s an issue with the PCB before building further.
Taking a few minutes here can save you hours of frustration later. Think of it as making sure the “brain” of your keyboard is healthy before giving it a body.
2. Stabilizers
After testing your PCB, the next step is installing the stabilizers. These are especially important for larger keys like the spacebar, enter, and shift, because they prevent wobbling and rattling.
Before installing, it’s a good idea to lube and tune your stabilizers. A little bit of lubrication on the housing and wires helps reduce unwanted noise and makes the keystrokes smoother. Some people also balance the stabilizer wires to prevent uneven rattle.
Once tuned, place the stabilizers into their correct spots on the PCB. If you’re using screw-in stabilizers, secure them carefully with screws. Plate-mounted or snap-in stabilizers simply clip into place, but make sure they are seated firmly.
3. Installing the Switches
Now it’s time to install the switches. Start by placing your plate on top of the PCB. The plate should sit securely, resting evenly on the stabilizers you installed earlier. This plate keeps your switches aligned and gives the keyboard extra stability.
Once the plate is in place, begin inserting your switches one by one. Line up the metal pins of each switch with the holes in the PCB before pressing them in. Make sure the pins are straight, because bent pins can cause the switch not to register later. A gentle but firm press should snap the switch into the plate and seat it properly on the PCB.
It’s a good idea to double-check that every switch is sitting flush and fully locked in. If a switch feels loose, pull it out carefully and reinsert it. Taking your time during this step will save you from troubleshooting issues later.
Tip: If your board has hot-swap sockets, switches will pop in easily. For soldered PCBs, you’ll need to solder the pins after installing.
4. Case
It’s time to prepare your keyboard case. If you’re building a gasket-mounted board, this is where you add the extra components like the daughterboard, gaskets, and any foam layers you want for sound dampening. These additions can make a huge difference in typing feel and sound, so install them carefully.
Once everything is ready, take the PCB and plate assembly you just built and gently place it into the case. Make sure it sits evenly, without any gaps or misalignment. If your case uses screws or mounting points, secure the assembly firmly, but don’t overtighten too much pressure can damage the PCB or warp the plate.
At this stage, your keyboard is starting to look complete. Adding foams or gasket strips here is optional, but it’s a nice touch if you’re chasing a specific typing sound or softer key feel.
Tip: Double-check the alignment of the USB port with the case opening before locking everything in it’s easy to overlook.
Conclusion
I hope you found this guide helpful. This pretty much covers the basics of building your own keyboard. Once you’ve finished and you’re 100% satisfied with your build, remember that everyone has their own taste and personal preference when it comes to keyboards. Some people love a heavy thocky board, while others want something light and clicky. There’s no single “perfect” keyboard it’s all about what feels right for you.
I’ve gathered this information carefully and tried my best to explain everything in simple words so you don’t get overwhelmed or confused during the process. At the end of the day, building a keyboard should be a fun and rewarding experience, not a stressful one. Take your time, enjoy each step, and don’t be afraid to experiment.
The best part? Once you’ve built one keyboard, you’ll likely want to build more. It becomes less about just having a tool to type on and more about creating something that’s uniquely yours.
And if you’re wondering exactly how many switches fit on a 75% board, check out our detailed breakdown of How many switches are in a 75% keyboard.


