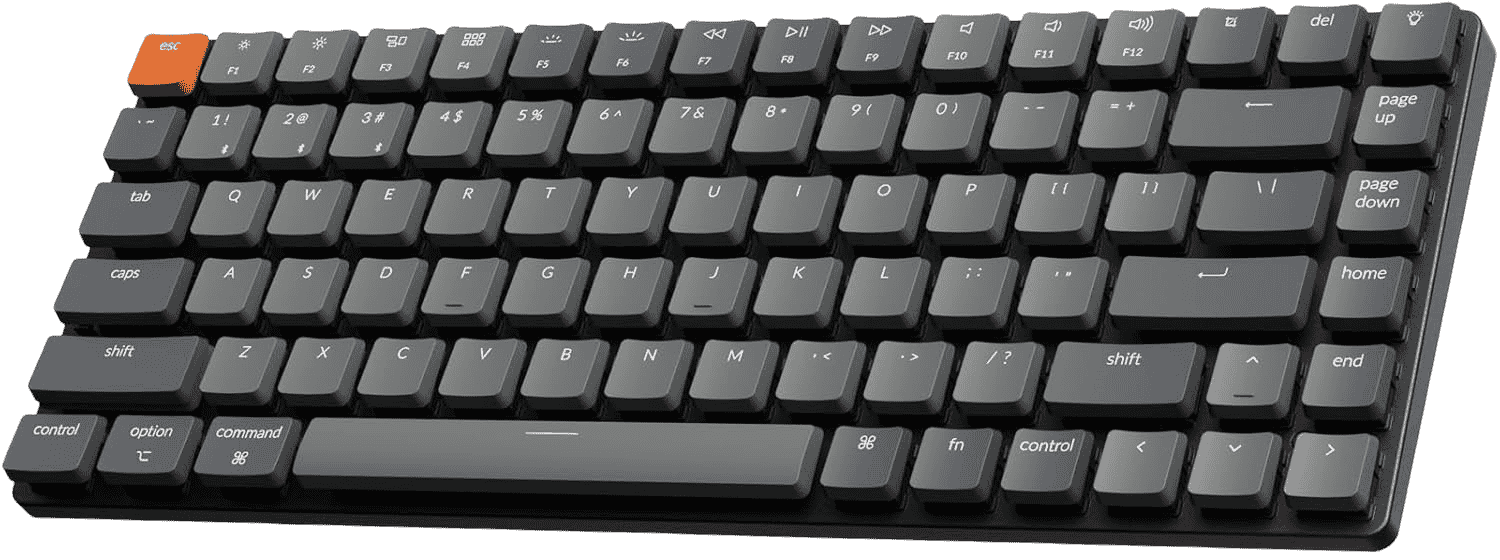
Hey, welcome! If you’ve wandered into the world of mechanical keyboards, you probably already know it’s a bit of a rabbit hole. I mean, who knew typing could become this much of a hobby? One second you’re just trying to get a new keyboard, next thing you know, you’re learning words like “lubing switches” and “flashing firmware.” Wild.
Today, I want to take you by the hand and walk you through two huge names you’re going to run into: VIA and QMK. These aren’t brands or keyboard models — they’re tools. Magic tools that let you make your keyboard do exactly what you want it to do. Sounds cool, right? It is and can also sound super complex if you’re hearing about it for the first time. Trust me, it’ll be as easy and nice as possible, pinky promise.
Basically, both VIA and QMK let you customize what your keyboard does when you hit a key. Ever wished your Caps Lock key did something useful? Or wanted a special layer of shortcuts you could tap into like a secret agent? That’s where these come in.
So, before we jump into the details of each, spend a moment to acknowledge that you are about to make your keyboard truly yours. To type is one thing, but to craft is another, and now you can do just that.

What is QMK?
Alright, so, QMK. Big breath — it stands for “Quantum Mechanical Keyboard.” (Yes, it sounds like a sci-fi novel title.) It’s basically a superpower for your keyboard. It’s a type of firmware — think of it like the invisible software brain inside your keyboard — that lets you reprogram every single key to do whatever you want.
The way QMK works is kind of old-school nerdy, but in the best way. You download some stuff onto your computer, you set up a little project, you write out a “keymap” — and then you “flash” it onto your keyboard. “Flashing” just means you’re updating the keyboard’s memory with your new commands.
The beautiful (and slightly intimidating) thing about QMK is: it’s as simple or as complicated as you want it to be. Wanna just swap Ctrl and Caps Lock? Easy. Wanna set up macros that launch six apps at once while playing a sound effect? QMK can do it.
If you’re someone who loves the idea of absolute control — like, full god-mode over your typing experience — QMK is gonna be your new playground. If that sounds a little intimidating… hang in there. There are easier ways too (spoiler alert: VIA).

History and Evolution of QMK
Once upon a time — okay, like, not that long ago, around the mid-2010s — people realized that standard keyboards were kinda… limiting. Some brilliant minds in the keyboard community, especially Jack Humbert from OLKB, decided, “Hey, what if we made something better?” Thus, QMK was born.
Originally, it grew from an older project called TMK (shoutout to Hasu, another legend), and it slowly evolved into the flexible, powerful system it is today. It started with tiny keyboards like Planck and Preonic, which needed lots of layers and custom stuff because… well, they were tiny.
Over time, QMK started getting adopted by tons of custom keyboards. People saw the beauty in having total freedom over their layouts. Suddenly, nerds, gamers, writers, coders — everyone wanted a piece of it.
Even cooler? QMK is open-source. That means it’s built by a community of passionate people and it’s constantly growing. Every month, someone somewhere adds a new feature or fixes a little bug. It’s like your keyboard gets smarter while you sleep.

Why You Might Want QMK
Let’s be real: QMK isn’t for everyone. It’s a little intense. But if you’re the kind of person who loves tinkering, customizing, and generally bending tech to your will, it’s an absolute dream.
You might want QMK if:
- You like the idea of custom layers (think: gaming layer, work layer, memes layer… no judgment).
- You want crazy macros (one button that launches Spotify, Slack, and turns on your RGB lighting? Yep.).
- You get a little thrill out of seeing something you built actually work.
It also unlocks deeper features like tap dances (one key that does different things if you tap vs hold), combos (press two keys together for a different output), and much, much more.
On the flip side… QMK can be a bit overwhelming at first. But trust me, if you stick with it, the moment you flash your first working layout, you’ll feel like a freakin’ keyboard wizard.

What is VIA?
Now, let’s talk about VIA — and honestly, you’re probably gonna fall a little bit in love with it if you’re new to this world. VIA is basically QMK’s super chill cousin. It’s a tool that lets you remap your keyboard… without writing a single line of code.
Imagine you just plug in your keyboard, open a friendly-looking app, and start dragging and dropping key functions around. That’s VIA. It’s instant. No flashing, no scary programming. It talks to your keyboard live and updates it immediately.
It’s honestly magic, especially for people who just want to use their keyboard instead of spending hours tweaking it. And the best part? Many keyboards nowadays come pre-flashed with VIA support. So you literally download the VIA app, open it, and boom — customization station.
Don’t get me wrong: it doesn’t have every super deep feature that QMK offers. But for 90% of users, it’s more than enough. And it makes keyboard customization feel accessible, even if you don’t know your macros from your layers (yet).

How VIA Differs from QMK
Okay, so if you’re wondering, “Why would anyone bother with QMK when VIA exists?” — good question. Here’s the deal:
VIA is like painting with a coloring book. You get the tools you need, but you’re kinda within a safe sandbox. QMK, on the other hand, is like a blank canvas where you can paint a Renaissance masterpiece if you want (or a complete mess, let’s be honest).
With VIA, you:
- Don’t need to know any programming.
- Can remap keys on the fly.
- Use a simple graphical interface.
With QMK, you:
- Write your own code to define exactly what happens.
- Flash the firmware manually.
- Get access to deeper customization like tap dances, advanced macros, and crazy custom logic.
So really, it’s about how much power (and complexity) you want. And hey, you can start with VIA and graduate to QMK later when you’re feeling adventurous.

Benefits of Using VIA
Let me just lay it out there: VIA makes your life a lot easier, especially if you’re new to mechanical keyboards.
Some big wins with VIA:
- Instant Gratification: You change something? It updates right then and there. No rebooting. No flashing. So satisfying.
- User Friendly: The interface is super clean. Even if you’ve never customized a thing in your life, you’ll feel comfortable in five minutes.
- Supports Layers: Yes, even complex stuff like multiple layers is handled with a few clicks.
- Accessible: Great for people who don’t want to learn a whole coding language just to swap two keys around.
In short, VIA removes a lot of the fear factor. It makes you feel like customizing your keyboard is no big deal. And that’s huge, because once you realize you can customize things, you start dreaming bigger and bigger.

QMK vs VIA: Which One Should You Use?
Now, the question I know you’ve been waiting to ask: Which is better for you — QMK or VIA?
Well, frankly, it’s… complicated. (Ugh, I know, but hear me out.)
If you’re someone who just wants to remap a few keys, maybe set up a media control layer, and not get bogged down in the messy details, then VIA is absolutely your best friend. It’s fast, it’s simple, and it’s pretty hard to screw up. You’ll feel powerful without needing a degree in Computer Wizardry.
On the flip side, if you’re the type who dreams of truly custom setups — like, tap-hold functions, per-key lighting effects, crazy complex macros — QMK is the way to go. Sure, there’s a learning curve. Sure, you might bang your head against the wall a few times. But when it all clicks? Pure, unfiltered joy.
Also, think about your patience level. Be honest with yourself. If you get easily frustrated when tech doesn’t “just work,” start with VIA. You can always dip your toes into QMK later if you get curious (and trust me, you probably will once you get addicted).
So, yeah — neither is “better” overall. It’s more about where you’re at on your mechanical keyboard journey. VIA is the gateway. QMK is the kingdom.

How to Get Started with QMK and VIA
Okay, okay — by now, you’re probably feeling that itch. You want to do the thing. You want to make your keyboard better. Love that energy.
Getting started honestly isn’t that hard if you know the right steps (and lucky for you, I’m about to lay them out).
For VIA:
- First, check if your keyboard even supports VIA. Most newer custom boards do, but double-check the manufacturer’s site.
- Then, download the VIA app. It’s super lightweight and installs quickly.
- Plug in your keyboard. Open VIA. If your keyboard lights up in the app? You’re golden. Start customizing!
For QMK:
- Things get a little spicier here.
- Check if your keyboard is QMK-compatible.
- Visit QMK Configurator — an online tool that helps you build layouts without touching code (thank goodness).
- Create your layout, compile it into a .bin or .hex file.
- Flash it onto your keyboard using a flashing tool like QMK Toolbox.
- Celebrate wildly when it works. (Optional, but recommended.)
Just remember: your first attempt might not go perfectly. And that’s okay! Part of the fun is learning (and maybe cursing a little before succeeding).

Things You’ll Need
Let’s be practical for a second. Here’s your shopping (and prep) list before you jump into the world of VIA and QMK:
1. A Compatible Keyboard
Not every keyboard supports QMK or VIA. Custom keyboards usually do, but some mass-market ones don’t. Always check first. In all honesty, the answer is… it depends, After all, it’s like trying to figure out what kind of charger do you need for your phone.
2. A Good USB Cable
No, seriously. Cheap cables can cause issues with flashing or even random disconnects during programming. Look for a good-quality USB-C or micro-USB, depending on your board.
3. Software Downloads
- VIA app if you’re going the easy route.
- QMK Toolbox + QMK Configurator if you’re feeling bold.
4. Time and Patience
I know, I know — you’re excited. But set aside an hour or two, especially the first time. Rushing this stuff is a recipe for frustration.
5. Optional But Helpful: A Backup Keyboard
Because… if you somehow brick your keyboard mid-flash (it happens), you’ll want something else to Google “how to fix bricked keyboard.”

Common Pitfalls and How to Avoid Them
Alright, if I can save you even one facepalm moment, it’s worth it. Here are some common beginner mistakes — and how you can totally dodge them:
1. Forgetting to Check Compatibility
Before you do anything, check if your board supports VIA or QMK. Not sure? Ask the community on Reddit, Discord, or just email the manufacturer. Saves so much heartache.
2. Bad USB Cable Troubles
This one bites a lot of people. If flashing fails halfway through or VIA won’t recognize your keyboard, it could just be a junky USB cable. (Don’t be like me — I wasted hours before figuring that out.)
3. Rushing Flashes
Double-check your layout and firmware before flashing. A typo in QMK could brick your board temporarily. No need to be scared — just move carefully.
4. Not Saving a Backup
Before you start changing everything, save a copy of the default layout or firmware. Trust me, you’ll thank yourself if things go sideways.
5. Getting Overwhelmed and Giving Up
Take a moment off whenever you wish to because it is totally reasonable for someone to feel a bit swamped.
Ask for help. No shame in learning at your own pace!

Conclusion
Whew — we covered a lot. And if you made it this far, you’re already way ahead of most people who just buy a keyboard and never touch it again.
Whether you end up using VIA, QMK, or just reading about both and sticking to stock layouts (hey, no judgment), the cool thing is: you know you have options. You’re not trapped by whatever the keyboard came with out of the box. You’re in charge.
And honestly? That’s kind of the spirit of the whole mechanical keyboard community. It’s about making your stuff yours. Whether you build a whole custom board from scratch or just swap one key’s function to something better… you’re customizing your experience. You’re creating your own tiny piece of awesome.
If you ever feel stuck, confused, or overwhelmed, just remember: everyone was a beginner once. Even that guy in the forums with the crazy RGB macro dance layers? Yeah, he bricked his keyboard once too.
So go out there. Customize something. Make it yours. And have so much fun doing it.

Ready to eliminate key wobble and chatter? Follow our hands‑on walkthrough for How to use Durock stabilizers and enjoy buttery‑smooth big keys.