Keyboard switch leaves might sound nerdy, but they’re the tiny metal springs behind every satisfying keystroke you make. Imagine you’re tapping away on your favorite mechanical keyboard: that gentle bump or crisp click comes from a leaf inside the switch making (or breaking) an electrical contact. You don’t chat with dozens of switches at once, you’re talking to one switch at a time, and the leaf is its heart. Understanding leaves helps you pick switches that feel “just right,” like Goldilocks finding her perfect porridge.
Beyond feel, leaves affect durability, noise, and even the electrical stability of your keyboard. A good-quality leaf resists wear and fatigue, so your board won’t get that squishy, unresponsive feel after a year of heavy typing. On the flip side, a poorly designed leaf can chatter (register double-presses), go crunchy, or fail early—super frustrating if you’re in the middle of an epic game or typing an urgent email.
In this article, I’ll walk you through what switch leaves are, why they matter, and how to tweak them for peak performance. No AI jargon—just real-talk about springs, metals, and the magic behind each click. By the end, you’ll know enough to impress your friends (or at least your keyboard-club buddies) and pick the perfect switch for your style.

What Is a Switch Leaf?
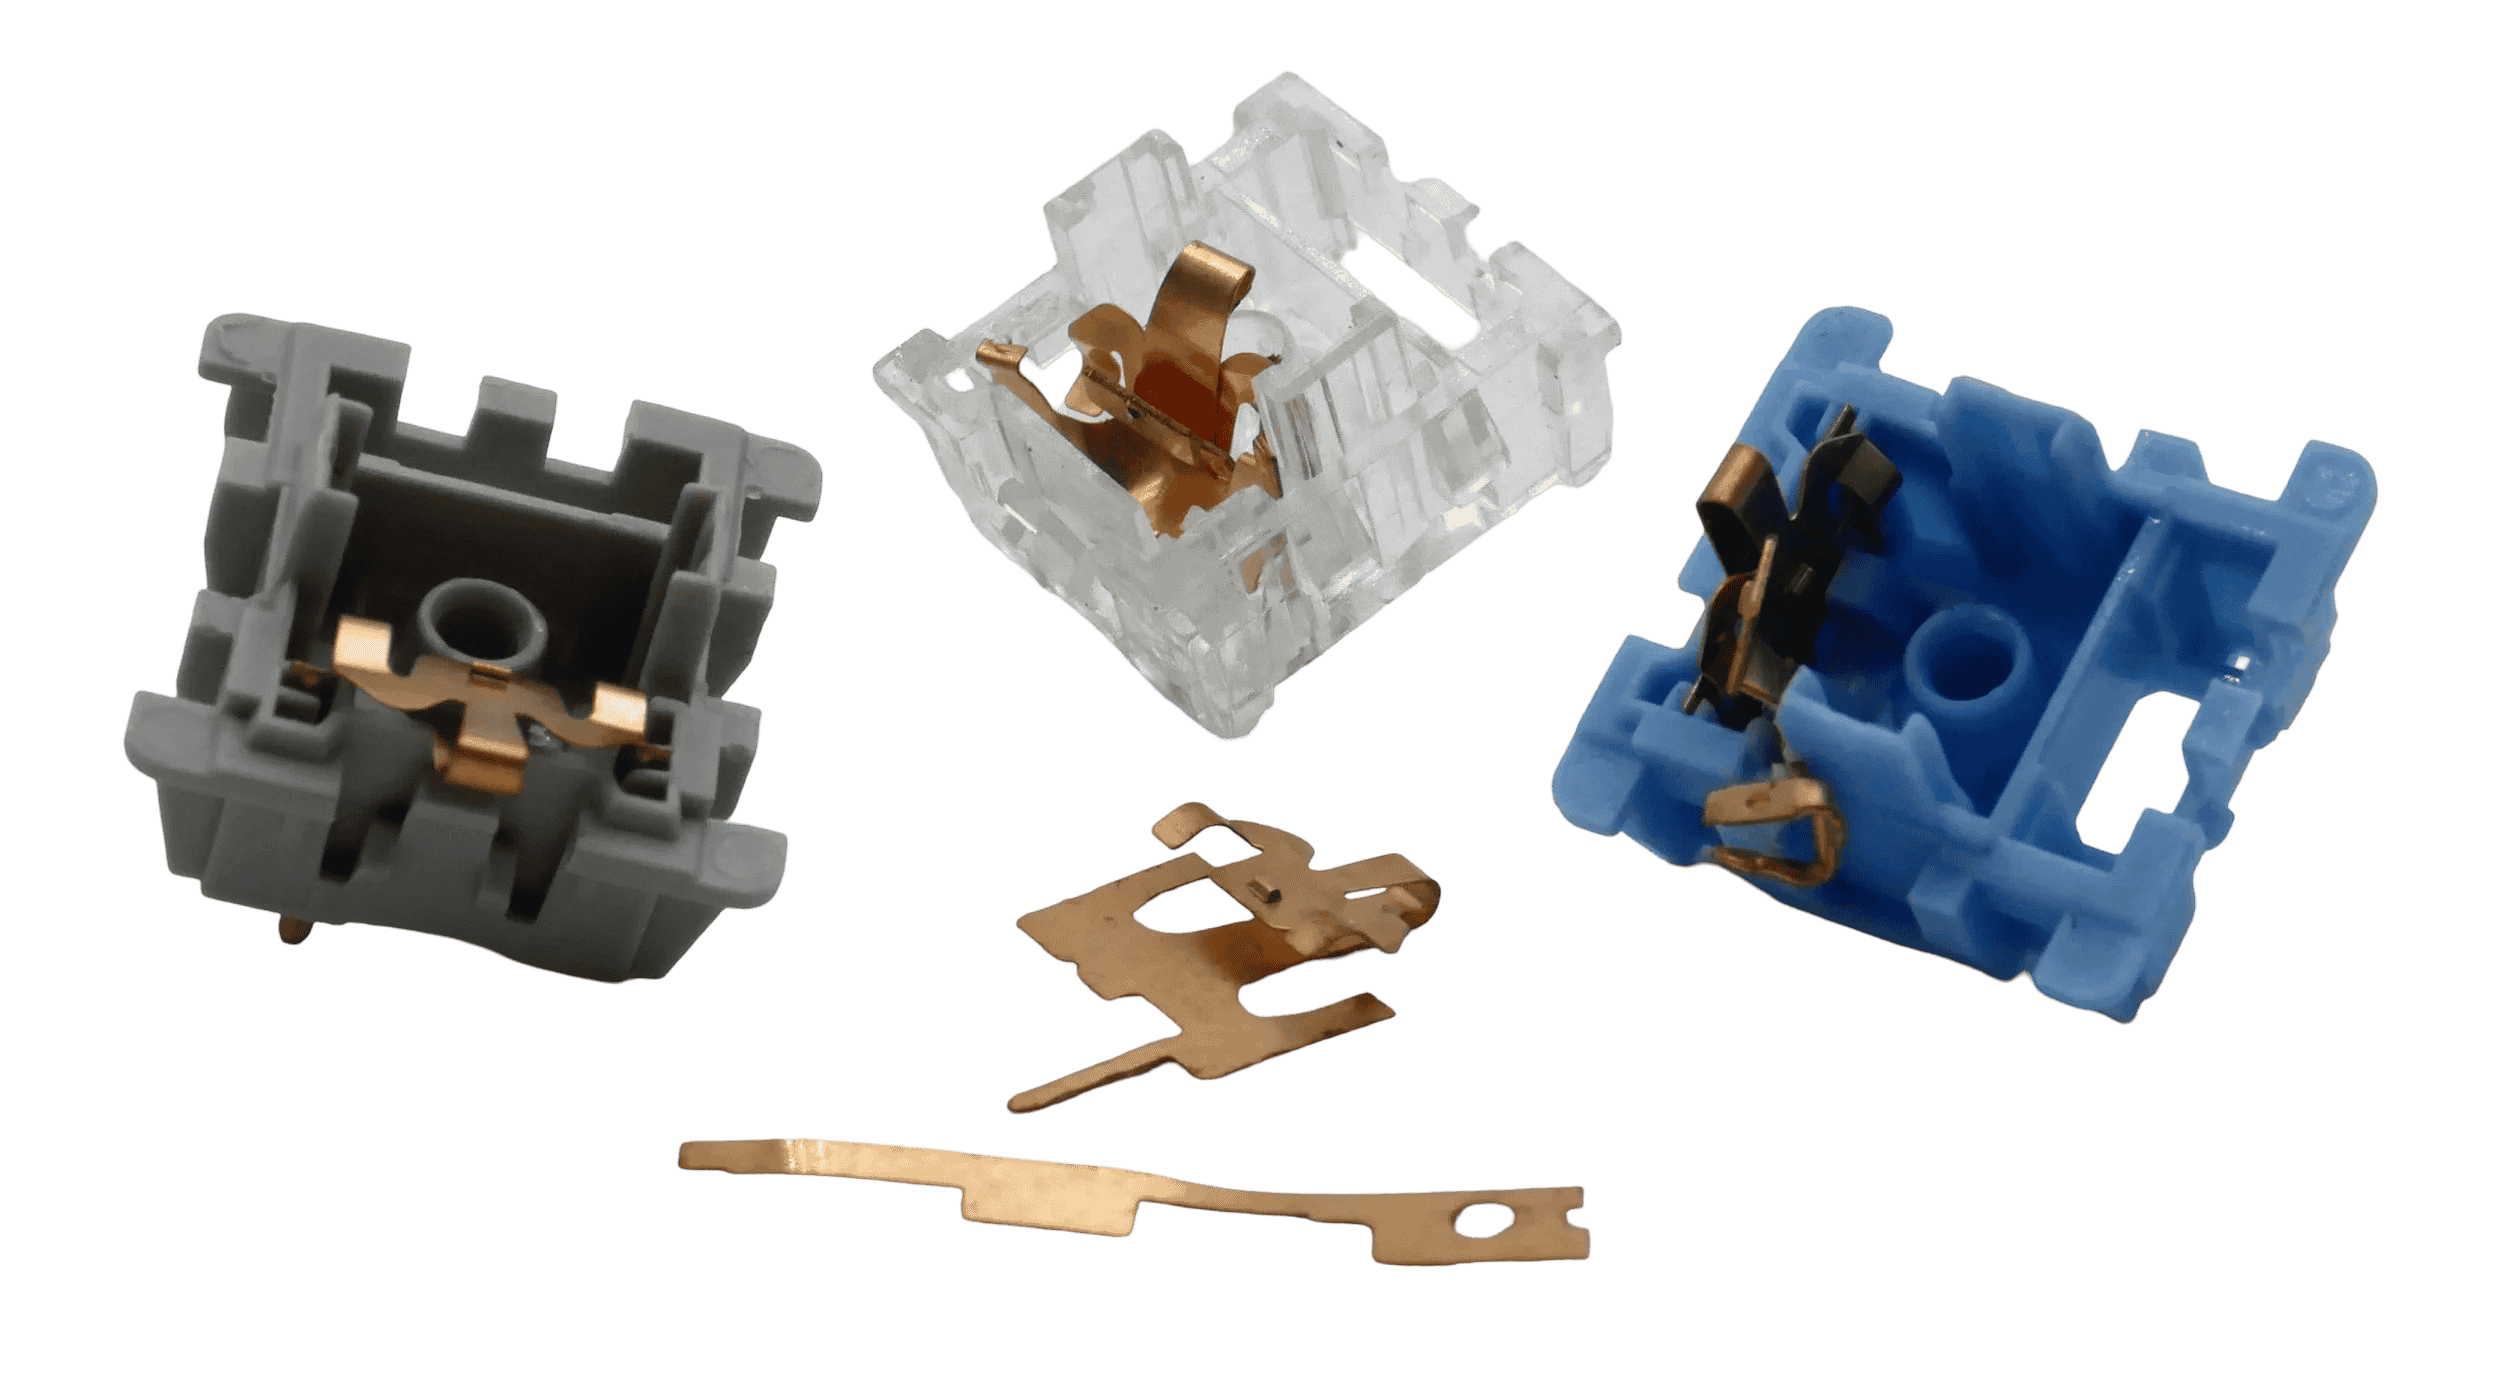
In basic terms, a switch leaf is a thin strip of metal, typically made of phosphor bronze or stainless steel, configured as a beam or a spring. When you press down on a key, the stem pushes the switch leaf down until it bends and contacts a secondary contact point, completing the switch and sending a signal to the computer indicating a key was pressed. Release the key, the leaf springs back, breaking the connection and registering “key released.”
Think of it like a tiny diving board: press it down, it flexes and makes contact; lift off, it snaps back. That flex adds resistance you can feel—sometimes a gentle bump (tactile), sometimes a smooth glide (linear), or even a clicky snap if there’s a little extra mechanism. The exact shape, thickness, and material determine how stiff it is, how pronounced the bump feels, and how reliably it repeats cycles without fatigue.
Because leaves are so central to actuation, switch manufacturers obsess over leaf specs. A leaf that’s too thick yields heavy, sluggish keys; too thin, and it might chatter or wear out quickly. Some customizers even swap leaves between switches, chasing that perfect balance of smoothness and feedback. Wild, right? But that’s what makes the hobby so fun—you can literally tune your typing feel at the molecular level.

Anatomy of a Mechanical Keyboard Switch
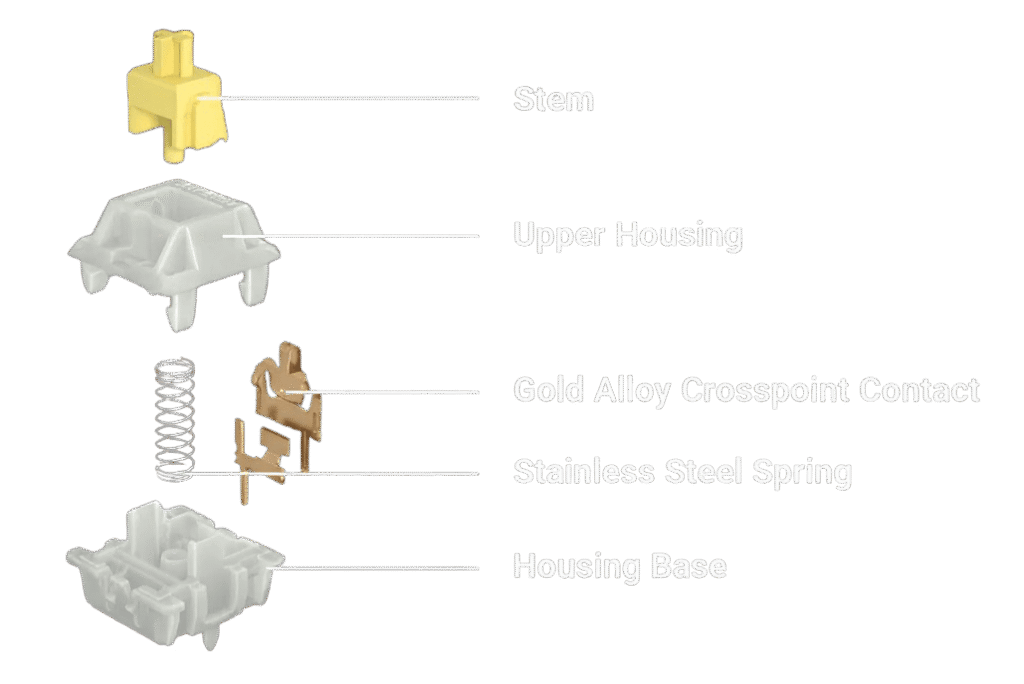
A mechanical switch is surprisingly simple in parts but complex in how they play together. You’ve got the housing, which cradles everything; the stem, which you press; the leaf, the springy conductor; and sometimes a little click jacket or tactile bump piece for extra feedback. It’s like a mini machine—each part needs to be just right.
The housing holds tolerances tight: too loose, and the stem rattles; too tight, and it binds. The stem translates your fingertip force directly onto the leaf. And the leaf? Well, we just talked about that—totally key for both the electrical contact and the tactile signature. In some designs, two leaves are used: one for contact, another for guiding tactile feedback.
Understanding how these bits fit together helps you diagnose issues. Sticky keys? Maybe your leaf is gunked up. Scratchy feel? The housing tolerances or stem finish might be off. Double-types? The leaf might be misaligned or fatigued. Once you know the anatomy, you can open switches, lube them, swap parts, or pick new ones like a pro.

Housing and Stem Overview
The housing is usually two pieces—top and bottom—molded from plastic (nylon, polycarbonate, POM). It needs to be super precise: micron-level tolerances ensure the stem moves straight up and down without wobble. Any wobble changes how the stem presses the leaf, altering feel.
The stem is the part you see and touch. It rides inside the housing, pressing down on the leaf and spring. Different stem shapes (cross, plus, or proprietary) mean different keycap compatibility and different friction. Smooth, high-quality stems slide with minimal scratchy noise; rougher stems add character but can sound and feel gritty.
Lube your stems and housings, and you’ll notice a silky, damped motion. Skip the lube, and you might get a rattly, scratchy experience, especially on cheaper stock switches. Many enthusiasts swap housings or stems between brands to achieve that perfect “glide”—kind of like sushi chefs choosing the best rice.

The Role of Switch Leaves
Switch leaves sit at the heart of the switch’s electrical and tactile performance. When the stem pushes down, it arches the leaf until it touches the lower contact, sending your keystroke. The leaf’s geometry (thickness, width, bend angle) dictates actuation force and keyfeel.
Some switches use dual-leaf designs: one leaf for conduction, another leaf or “tactile nub” to create that bump. The tactile piece might be a little bump molded into the leaf or a separate component that snaps over it. When you press, the snap-action creates a sharp click—satisfying for typing maniacs and gamers alike.
Precision in leaf manufacturing means less debounce (the tiny delay switch electronics use to confirm a stable signal), more consistent force curves, and longer life. Swap out a leaf from a stiff switch into a lighter one, and you’ll feel the difference immediately—either “wow, that’s buttery” or “ouch, that’s too floppy.”

Types of Switch Leaves and Materials
When you dive into the world of switch leaves, you’ll quickly notice there’s not just one flavor of springy metal—there are multiple types, each with its own personality. Broadly speaking, leaves differ by material (what metal they’re made of) and design (how they’re shaped or bumped). Between phosphor bronze, stainless steel, and even gold-plated contacts, your switch’s “soul” can feel buttery, buzzy, or brittle.
Phosphor bronze is the workhorse: it’s got a natural springiness, decent conductivity, and resists corrosion. Most mid-range switches use it, because it balances feel and longevity without costing an arm and a leg. Stainless steel leaves are stiffer; they’ll give you a heavier, more “industrial” press that some typists swear by when they want firm feedback. Then there’s the exotic stuff—gold or silver plating on contact points to minimize oxidation and chatter, often found in high-end or hot-swappable custom builds.
Beyond materials, you’ll see design variations: flat leaves for smooth, linear action; leaves with a tiny, molded bump or separate “tactile nub” for that little click when you hit actuation; and even dual-leaf setups where one leaf handles conduction and another handles tactile feedback. These designs shape the switch’s “force curve”—how the resistance changes from top to bottom. A gentle hill, a sudden spike, or a crisp snap all come from clever leaf geometry.
Understanding these types means you can predict how a switch will perform before you buy or open it. Want a silent office board? Phosphor bronze, flat leaf, dampened spring. Building a click-clack stream machine? Stainless steel with a sharp tactile bump. Once you know your options, you’re not picking at random—you’re curating the exact experience you crave.

Leaf Materials and Properties
Okay, let’s geek out over metals. Phosphor bronze (PB) is the most common: it’s an alloy of copper, tin, and a dash of phosphorus that gives it extra spring and corrosion resistance. In plain English, PB leaves bounce back nicely and don’t rust in your sweaty hands. Conductivity is solid, so you get a clean electrical signal—no accidental double-fires mid-essay.
Stainless steel (SS) leaves, on the other hand, are stiffer and a bit louder. SS is tough: it resists scratches and deformation, so a switch with an SS leaf might outlive a PB leaf by a few million keystrokes. But that extra durability comes at the cost of a heavier actuation feel—think of pressing down on a firmer mattress instead of a plush pillow. Some people like that firmness for gaming, where accidental presses are a no-go.
Gold-plated contacts often appear as a thin layer on top of PB or SS. Gold doesn’t oxidize, so your switch stays crisp even years down the line. You’ll pay extra for gold plating, but if you hate chatter or live in a humid climate, it’s worth considering. A little gold goes a long way to keep that click sharp.
Some boutique switches use unconventional alloys—beryllium copper for extra bounce or nickel coatings for unique tonal qualities. The exact percentages and manufacturing processes can vary by brand, which is why two “phosphor bronze” leaves might still feel different. Manufacturers tweak annealing (heating and cooling) to change hardness, and coatings to tweak friction.
At the end of the day, the metal you choose sets the baseline. Material science meets finger-science here—pick wisely, and you’ll feel it in every keystroke.

Contact Leaf vs. Tactile Leaf Designs
Switch leaves come in two main design camps: contact leaves, which simply close a circuit, and tactile leaves, which add a little bump so you feel the exact moment of actuation. Contact-only (linear) leaves are flat or gently curved beams. You press, the beam flexes, contacts touch, and you go on your way—smooth, even resistance from top to bottom.
Tactile leaves have a tiny protrusion or an integrated bump that creates a “snap” at actuation. Picture a miniature hill in the leaf’s arc: you climb resistance, hit the peak (actuation), then drop into a valley before bottoming out. That peak is your tactile feedback. Some designs mold the bump into the same piece of metal; others attach a separate plastic nub to the leaf. The latter often gives a sharper, more pronounced feel.
Then there’s dual-leaf designs: one leaf for conduction, another purely for tactile feedback. The conduction leaf stays flat and reliable, while the tactile leaf does the snapping. This separation can yield crisper, more consistent bumps without risking electrical chatter. On some super-high-end switches, each leaf is made of different alloys—one optimized for conductivity, the other for spring dynamics.
Which is right for you? If you love linear, silky-smooth typing (think coding marathons), go contact only. If you need that physical cue to know you’ve actuated (dead-key avoidance in gaming), tactile leaves are your friend. And if you can’t pick just one, dual-leaf switches try to give you the best of both worlds—at a price.

Switch Leaf Function in Actuation and Tactility
At this point, you know leaves come in different metals and shapes. But how do they actually translate your finger’s intention into binary bits? It all comes down to the leaf’s interplay with the stem and contact surfaces to produce a specific force curve—a graph of resistance vs. travel distance. That curve defines “how it feels” when you press a key.
When you start pressing, the leaf barely bends—light spring force keeps stem centered. As the stem travels further, the leaf flexes more, building resistance. For a linear switch, resistance climbs steadily until contact closes. You won’t feel a bump; it’s a smooth hill. For a tactile switch, resistance peaks at the bump, you feel that on your fingertip, then resistance drops slightly as you pass actuation, before climbing again to bottom out. In clicky switches, a separate mechanism “snaps” and produces an audible click in addition to a tactile spike.
Beyond feel, the leaf’s geometry affects actuation force (how many grams it takes to close the contact) and reset force (force to release it). Manufacturers publish these specs—say, 45 g actuation, 50 g bottom-out—but your finger feels the leaf’s subtle quirks more than raw numbers. A well-made tactile leaf has a clean spike at 45 g; a sloppy one might have a broad, undefined bump that feels mushy or inconsistent.
Understanding function lets you tweak or modify switches. Want a lighter bump? File down the tactile nub. Need a crisper click? swap in a stiffer leaf or add a click jacket. Your typing style, weight, and even posture can change how you perceive that curve. Once you get the dynamics, you’re no longer a passive typist—you’re an artisan shaping your keyboard’s voice.

Linear vs. Tactile vs. Clicky Mechanisms
Let’s break down the big three:
- Linear: The leaf is a flat, uniform beam. Press down, it flexes at a constant rate. No bump, no click—just a smooth gradient. Perfect for gamers who want fast double-taps and typists who crave consistency.
- Tactile: The leaf has a molded or attached bump. As you press, you hit a resistance peak—your finger notices “hey, I actuated!”—then force dips. It’s like going over a speed bump. Super helpful if you want feedback without noise.
- Clicky: Built on a tactile design, but with an extra leaf or plastic “click jacket” that snaps into place, producing a crisp “click” sound. This snap-action comes from the leaf flipping past a threshold, then springing back. It’s louder, yes—but oh, so satisfying when you want audible confirmation.
Behind the scenes, each mechanism tweaks the leaf or adds components. Linear leaves stay simple; tactile leaves integrate a nub or bump; clicky leaves add a secondary snap leaf or click bar. The manufacturing precision matters: if the tactile nub is off by even 0.1 mm, the bump feels muted or harsh.
Your choice depends on use case and environment. Need stealth? Stick to linear with dampened springs. Miss feedback? Tactile’s your friend. Want to annoy your roommates (or delight your ASMR fans)? Clicky all the way. There’s no single “best”—only the one that matches your mood and context.

Leaf Thickness and Feel
Thickness matters more than you might think. A thicker leaf means more stiffness: you’ll need to press harder, and the resistance curve will be steeper. Thinner leaves flex easily, giving a lighter, almost floaty feel—but risk chatter or premature wear. Manufacturers calibrate leaf thickness in microns; a 20 µm change can be noticeable.
Imagine bending a thick paperclip versus a thin one. The thick clip fights back, the thin one surrenders quickly. That’s exactly the trade-off in switches. Heavy typists or gamers who bottom-out hard often prefer thicker leaves for durability and consistent feedback under rapid presses. Lighter typists chasing silky action lean toward thinner leaves, but they might need to open the switch later to replace a fatigued leaf.
Thickness also influences tactile sharpness. In a tactile leaf, a thicker beam will accentuate the bump—like a steep hill, you feel every contour. A thinner beam rounds out the bump, making it feel softer or more “mushy.” Some custom switch makers even laser-cut leaves to sub-micron precision to achieve the perfect bump profile.
If you’re modding, you can mix and match leaves of different thicknesses to tweak feel. Just be careful: combining incompatible materials or thicknesses can lead to misalignment, chatter, or even a leaf that doesn’t reset properly. Trial and error is part of the fun—but keep some spare switches handy in case things get wonky.

Maintenance and Optimization of Switch Leaves
Even the sturdiest leaf can go slack or noisy without some TLC. Over months of typing, dust, oils, and grease sneak in between the leaf and housing, gumming up its spring action. Swapping leaves isn’t the only answer; cleaning and lubing can extend life and restore that buttery feel. Plus, simple mods—like polishing leaf surfaces or adding a tiny film of dielectric grease—can reduce chatter and noise.
Before you pop open a switch, ask: Is my typing dull or scratchy? Do I get occasional double-presses? That’s usually a leaf or contact issue. A quick blast of compressed air might solve gunk, but real improvement comes from disassembling, cleaning in isopropyl alcohol, and reassembling with a thin coat of specialized switch lube on the leaf’s beam. Avoid too much lube—it dampens feedback and can attract more dust.
Beyond basic cleaning, you can optimize by polishing the leaf’s contact surface with a fine-grit polishing stick to ensure smooth electrical connection. Some enthusiasts “film-mod” contacts with tiny patches of dielectric grease to stabilize actuation and reduce chatter. Others add silicone dampeners at the bottom to soften the final travel—and indirectly preserve leaf life by reducing shock loading.
Regular maintenance keeps leaves springy and reliable. If you notice degraded performance—sluggish resets or inconsistent tactile bumps—it’s time for a teardown. A little elbow grease, some isopropyl, and minimal lube can breathe new life into vintage or budget switches, making them feel almost new again. And if you still crave a different feel, at least you’ll know your leaves were given a fair shot.

Cleaning and Lubrication Techniques
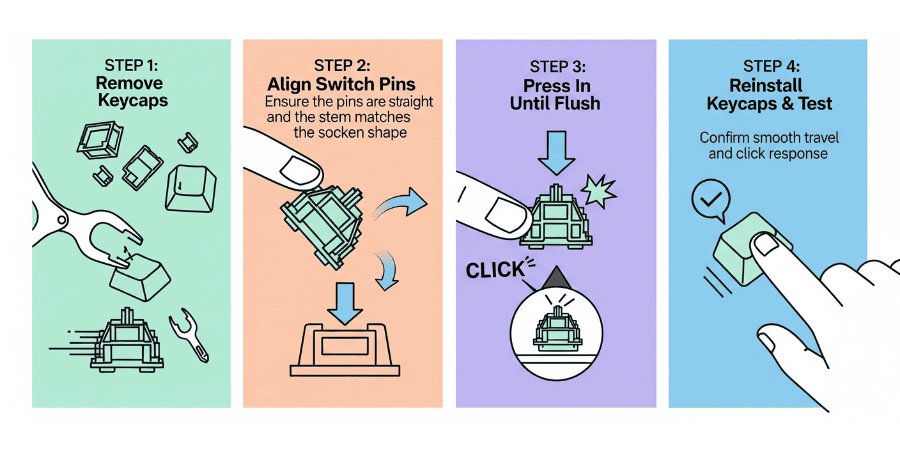
Let’s get hands-on. First, gather tools: a switch opener, fine-tip brush, isopropyl alcohol (90%+), and thin switch lube (like Krytox GPL 205). Open the switch carefully—top housing pops off, revealing stem, spring, and leaf. Gently remove the stem to access the leaf without bending it out of shape.
Dip the brush in isopropyl and lightly scrub the leaf beam and contact area—remove visible grime but don’t soak the leaf in liquid or you risk corrosion later. Let parts air-dry completely; alcohol evaporates fast, so a few minutes is usually enough. Meanwhile, check the housing and spring for gunk and clean them too if needed.
For lubrication, apply a thin coat on the leaf’s beam away from the actual contact area—excess lube near the contact can cause chatter or delayed signals. A small dab on the spring ends and stem rails will dampen scratchiness without killing tactility. Reassemble in reverse order: leaf back in housing, spring on top, stem inserted, housing closed.
Test the switch for smooth travel and consistent actuation. If it feels sluggish or the bump is muted, you probably over-lubed—disassemble and gently wipe off excess. If it feels gritty, add a smidge more. Practice makes perfect; after a few switches, you’ll get a feel for the right lube volume.
Common Pitfalls and Solutions
Even pros slip up. One classic mistake: over-lubricating. Smothering leaves in grease dampens the snap you paid for. If your tactile spikes disappear or your clicks sound muffled, you’ve probably gone heavy-handed. Fix: reopen, wipe with alcohol, and re-lubricate sparingly.
Another trap is misalignment when reassembling. If the leaf isn’t seated perfectly, you’ll get chatter (rapid on-off signals) or sluggish reset. Always align the leaf’s “ears” into their cutouts in the housing before snapping it shut. If you hear double-presses, double-check alignment and clean contacts.
Using the wrong lubricant is a rookie move—household oils or generic greases attract dust, gum up over time, and degrade plastics. Invest in switch-specific lubes; they’re formulated to stay tack-free and stable.
Lastly, mix-and-match madness: swapping leaves between incompatible housings or springs can lead to binding, misfires, or broken parts. If you’re experimenting, do it in small batches and keep notes on which combinations worked. That way, you avoid dismantling your entire board after a mis-mod.
Remember, switch modding is part science, part art. Embrace the trial-and-error, learn from slip-ups, and soon you’ll be crafting keystrokes that sing.

For a closer look at how those crisp, wear‑proof legends are made, explore our deep dive on What are Double Shot Keycaps?.