How to use durock stabilizers

Okay, let’s keep this simple but honest. If you’ve ever pressed your spacebar and it felt like an old seesaw at a playground—creaky, uneven, maybe even noisy—then stabilizers are your new best friend. And not just any stabilizers… we’re talking Durock.

Durock stabilizers are like a quiet upgrade that makes a loud difference. You probably stumbled across them while digging through forums or maybe during a late-night YouTube binge. Either way, you’re here now. So what makes them worth the hype?

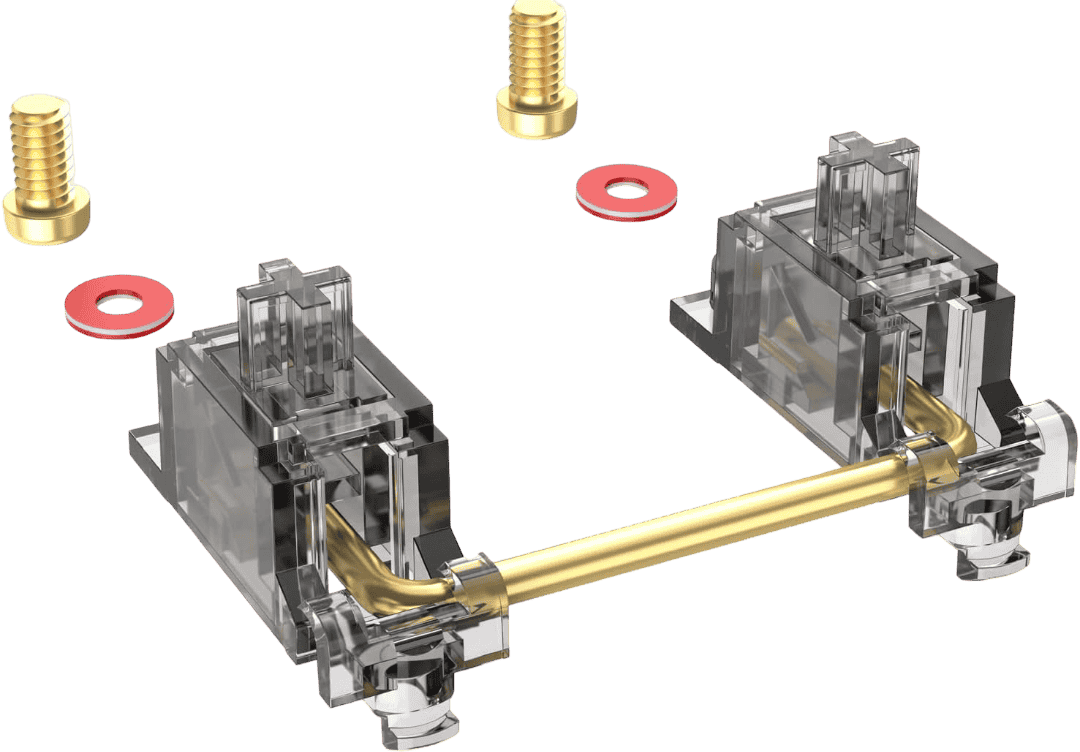
They’re screw-in (so they stay in place), pre-clipped (less prep work for you), and made with premium materials that feel… honestly, buttery. When installed and lubed right, they completely transform how your larger keys feel—smooth, balanced, and none of that awful rattle.

Unlike stock stabilizers (which most prebuilt boards come with), Durocks don’t sound hollow or plasticky. They actually help you feel connected to your keyboard. Weird, but true.

And here’s the best part: once you learn how to install and mod them properly, it’s one of the most satisfying little projects in this hobby. If you love keyboards—or even just hate bad spacebars—this is a rabbit hole worth crawling into.

Img
“Clip-in vs. screw-in stabilizers: a quick look at the difference! 🤔⌨️”

What Makes Durock Stabilizers Different from Stock Ones

Let’s call out the elephant in the room: most stock stabilizers are garbage. Sorry, but it’s the truth. They’re often loosely mounted, over-lubed or bone-dry, and come with enough rattle to make you question your life choices.

Durock stabilizers? Whole different beast.

They’re screw-in, which means they actually stay put on your PCB. That alone is a game changer. No more stabilizers popping out when you remove your keycaps. No more shifting mid-press.

Second, they come with pre-clipped legs. If you’re new to this, that just means you don’t have to sit there with nail clippers snipping little plastic bits off. Pre-clipped = less wobble and a tighter bottom-out feel.

And the materials? Chef’s kiss. The housing is made from a nylon blend that reduces unwanted vibration. Plus, the gold-plated wires not only look fancy but help reduce friction and keep the whole mechanism stable.

Bottom line: Durocks are smoother, quieter, and more secure. You are going to notice a difference on your first spacebar press. Like, “Ohhh… that’s how it’s supposed to feel.”

Img
“Premium stabilizer features explained! Less noise, smoother clicks. ✨⌨️”

Tools and Supplies You’ll Need

Let’s quickly assess. Make sure to have the right tools before you start pulling off keycaps and disassembling stabilizers. This isn’t rocket science, but having the proper tools makes the process way less painful.

Here’s what you absolutely need:

  • Durock stabilizers (duh)
  • Screwdriver for mounting them
  • Thin brush for lubing
  • Krytox 205g0 or Dielectric grease
  • Tweezers (super helpful for small parts)
  • Keycap puller
  • Switch puller
  • Clean workspace (trust me, these tiny wires disappear like socks in a dryer)

This list might feel like a lot at first, but think of it like a toolkit for keyboard magic. Each item has a purpose, and once you start using them, it becomes second nature.

If you’re just starting out, don’t go overboard. Use what you have. Just make sure you’re not using thick, goopy lubes or oversized brushes. Precision matters here.

And hey, don’t stress if your first attempt isn’t perfect. No one’s stabilizers were perfect the first time—mine definitely weren’t. It’s all part of the journey.

Img
“Everything you need to get your stabs silky smooth! ✨”

Choosing the Right Lube for the Job

This part can get a little nerdy, but it really matters. The lube you use for your Durock stabilizers can make or break the whole experience.

If you’re asking, “Can’t I just use any lube?”—please don’t. Not all lubes are created equal.

Your best bet is Krytox 205g0 for the housing and sliders. It’s thick enough to coat evenly but smooth enough not to gum up the works. For the wires, though? Go with Dielectric grease. It’s a little thicker and helps eliminate that annoying wire rattle.

Here’s the key: don’t overlube. I know the temptation is real—more lube = more smooth, right? Wrong. Too much lube and suddenly your keys feel mushy or don’t return properly.

Apply it in thin, even layers. Focus on contact points: where the stem touches the housing and where the wire clips in. You’ll thank yourself later.

And if you’re feeling fancy, use a brush with synthetic bristles for better control. Think of yourself as a mini keyboard surgeon.

Img
“Lube it right, not too much! Smoothness is the goal. 😉⌨️”

Optional (But Helpful) Accessories

Alright, you’ve got your Durock stabilizers and your lube. That’s technically all you need. But if you want the smoothest, least-stress experience possible? A few little extras can make a big difference. Think of this like having the right playlist while cleaning your room—it’s doable without it, but way better with it.

First up, a switch opener. This isn’t essential for stabilizers, but if you’re planning to mod your switches too, get one. It saves your fingertips and your sanity.

Next, grab a pair of fine tweezers or precision pliers. Trust me, these little parts can bounce across your desk and disappear like socks in a dryer. Tweezers help with spring alignment, clipping film, or just holding stuff in place.

A keycap puller and a switch puller (if your board is hot-swappable) are also super helpful. They make teardown less of a chore and keep you from scratching your board.

Also—get a small flathead screwdriver or plastic spudger for disassembly. And if you’re going full modder mode, maybe even a band-aid mod kit (for dampening sounds), or a stabilizer foam pad kit. These are the cherry on top if you’re hunting for that ultra-clean sound.

Last but not least: a clean, well-lit workspace and a small container for screws and springs. You don’t want to be crawling on the floor because your spacebar wire yeeted itself mid-mod.

Img
“All the bits and bobs for a keyboard makeover!”

Step-by-Step: How to Prepare Your Durock Stabilizers

With all the steps outlined, you are now ready to start. Prepping your Durock stabilizers is kinda like cooking a good meal: the magic’s in the prep.

Take your stabilizer kit out and lay everything flat. You should have housing tops, housings bottoms, wires, and maybe some screws depending on your kit. First thing? Inspect for any manufacturing issues. Rare, but better to find out before they’re mounted.

Then, disassemble each stabilizer. Gently pull apart the housing top from the bottom and remove the stem and wire. Lay them out neatly.

Now comes the most meditative part: lubing. You’ll want to lube the inside of the housing where the stem slides. Think of it like moisturising your hands—you want smoothness, not gunk. For most people, dielectric grease or Krytox 205g0 is the go-to.

Lube the feet of the stem (the part that contacts the housing) and where the wire sits in the stem. Don’t glob it on—use a brush and go for a nice even coat. Then lube the inside part of the stabilizer housing that makes contact with the stem, plus the curved ends of the wire.

Now reassemble: pop the stem back into the housing, snap the top on, and insert the wire. If done right, it should feel snug and have a “return” springy motion.

Prep all of them this way before moving on. You’ll thank yourself later.

Img
“Lube ’em up for a smooth ride! 🚗”

Breaking Down the Stabilizers

Let’s slow it down here because this part can trip people up. When I first opened a bag of stabilizers, I swear I just stared at the pieces like I’d ordered IKEA furniture without instructions. But really, it’s simpler than it looks.

Here’s what you’re looking at:

  • Housing bottom: This is the main part that mounts to your keyboard. It has clips and a slot for the wire.
  • Housing top: Snaps onto the bottom to hold everything in place.
  • Stem: The little moving piece that the wire clips into. It’s what actually moves when you press a key.
  • Wire: This is what connects both sides of the stabilizer under a large keycap (like your spacebar or shift key) so that both sides move together.

Durock stabilizers are pre-clipped, which means you don’t have to cut anything. (Yay for less prep!) But it’s still good to know how they work, especially when you’re lubing or trying to fix ticking sounds later.

Each stabilizer is like a mini machine. The stem sits inside the housing and rotates slightly when you press a key, pushing the wire down. That’s why lubing the contact points matters so much—you’re smoothing out all those mini movements.

Take your time here. Play with a few before installing them. When they’re lubed right and assembled correctly, they almost feel spring-loaded, like tiny damped pistons. That’s the goal.

Img
“Durock stabs, broken down for science! 🔬”

Lubing and Modding Tips That Actually Work

This is the fun part—if you like fiddling. If not, I promise it’s worth it anyway. Lubing stabilizers is what separates a clacky mess from a buttery thock.

Start by choosing your lube. Krytox 205g0 is thick, great for stabs. Just use a tiny brush (like a size 00). You’re not painting a house, just touching up key areas.

Where to lube:

  • Stem feet: Lube the flat part that moves against the housing.
  • Wire ends: Lube where the wire hooks into the stem—this is where most tick or rattle comes from.
  • Housing sides: The inside walls of the bottom housing where the stem will slide.

Be careful not to overlube the stem legs (the vertical ridges). Overdoing it can make your keystrokes feel mushy, not smooth. And don’t lube the outside of the stem or housing at all—only where parts touch during motion.

Want to go next-level? Try the holee mod. It involves putting a thin layer of band-aid material (or fabric tape) in the stem slot before inserting the wire. It cushions the wire and kills rattle, but it’s a bit extra—optional if you’re already overwhelmed.

As you go, test each one between your fingers. Does it return smoothly? Is it silent? That’s what you want. Once you get into the rhythm, it’s actually kinda therapeutic.

Img
“The secret to silky smooth stabilizers.”

Installing Durock Stabilizers on Your Keyboard

Your Durocks are lubed and ready. Now, comes the part where it either works perfectly or…not. The first time installing them can be quite daunting, but once you get the hang of it, plug-and-play with a bit of polish is all it takes.

Durock stabilizers are PCB mount, which means they screw directly into the circuit board. So before anything else, double-check your board is compatible. Most custom keyboards are, but if you’re working with a prebuilt, it’s worth confirming.

Step one: line up the stabilizer housing with the cutout on the PCB. The wire should be facing away from you, with the opening of the housing towards you. Once it’s aligned, press the stabilizer gently into place. It should click in neatly and not wobble.

Now take your stabilizer screws and thread them in. Don’t go full Hulk here—you want them snug, not stripped. Overtightening can actually make them sit unevenly, which defeats the whole point.

Once installed, give each one a wiggle check. They should be secure, smooth, and bounce back with no resistance.

And a little pro-tip? Test fit your plate and switches before going all-in on soldering or full reassembly. If something feels off, it’s a lot easier to fix now than later.

Img
“Screw it in tight for a wobble-free key!”

PCB Mount vs. Plate Mount: What You Need to Know

Okay, quick side quest. If you’re new to stabilizers, this part might’ve tripped you up already: what’s the difference between PCB mount and plate mount stabilizers?

Think of it like building a house. PCB mount is like bolting your furniture directly into the floor—solid, no wobble. Plate mount is more like placing things on carpet—still works, but you might get some movement.

PCB mount stabilizers (like Durocks) screw directly into the PCB. They’re more secure, less prone to rattle, and better for serious modders who care about feel and sound. If you’re investing the time, these are the ones you want.

Stabilizers that go on the plate are mounted differently. They clip onto the metal plate which sits above the PCB. They are easier to install, specifically into boards where access to the PCB isn’t possible, but the lack of stability they provide is a drawback. They can rattle more and feel inconsistent, especially over time.

So why does this matter? Because not every keyboard supports PCB mount stabs. Some prebuilt boards or budget kits only work with plate mount. If you’ve already got Durocks and your board isn’t compatible, you might need to get creative—or upgrade your board.

Img
“PCB mount vs. plate mount stabs: two ways to keep your keys steady!”

Avoiding Common Mistakes During Installation

Now, if you’re anything like me when I started, this is the part where you mess something up. Totally normal—but let’s try to avoid the most common landmines.

Mistake #1: Installing them backwards. This one’s brutal. The wire should always face away from you, not toward you. If it’s backwards, the key won’t bottom out properly and might stick or feel mushy.

Mistake #2: Not lubing properly. Too much lube? You get sticky, unresponsive keys. Too little? You’re back to rattly town. Apply it like you’re buttering toast—not drowning pancakes.

Mistake #3: Cross-threading the screws. These are small screws going into soft plastic housings. Force them and you’ll strip the threads or warp the housing. Start gentle, feel the threads catch, then tighten.

Mistake #4: Not seating the stabilizers fully. If the stabilizer isn’t flush against the PCB, it can cause uneven keypresses and even make switches harder to install. Always test fit with the plate before moving forward.

Mistake #5: Forgetting to test before full assembly. I’ve done it. You think you’re done, slap on the keycaps, and the spacebar feels like a rubber chicken. Save yourself the pain—test before you commit.

Img
“Stabilizer pitfalls to avoid! Don’t get stuck with sluggish keys or rattle.”

Testing and Tuning Your Stabilizers

Alright, let’s say you’ve got your stabs installed. Now what? You test. And not just a quick press—give those keys a proper workout. Spacebar, Enter, Shift—hit them like you’re typing mad on a Monday morning.

Start by listening. Do you hear any rattling, ticking, or pings? Press slowly and then quickly. Does the key return smoothly? Is it even on both sides?

If it sounds or feels off, you’ve got options. Sometimes it’s just a dry housing—you can open the stabilizer, reapply lube, and pop it back in. Other times, it’s about wire balancing—where one side of the wire is tighter or looser than the other. You can bend it slightly to even out the tension.

If the key binds (gets stuck), make sure the stabilizer is fully seated and that the wire isn’t bent out of shape. Occasionally, switches themselves can interfere with stabs, especially on tighter plates—so keep an eye out.

Also: consider a foam pad mod or a tape mod to eliminate micro-rattles between the stabilizer and PCB. They don’t work miracles, but they help.

Tuning is where the magic happens. Once you hear that smooth, thocky sound and feel that buttery motion? You’ll get it. It’s addictive.

Img
“The anatomy of a mechanical switch.”

Rattle, Tick, or Thock? How to Fine-Tune Your Sound

Alright, let’s decode the sounds. You’re chasing that rich, satisfying thock, but your board’s giving you rattle or tick instead. What gives?

Rattle usually means there’s too much room in the stabilizer housing or around the wire. The fix? Open it up, check your lube application, and maybe add a stabilizer foam pad underneath. Foam dampens excess movement and tightens things up.

Tick is trickier. It’s a sharp click sound when the wire hits the housing. This often means the wire ends are dry or rubbing against the plastic. Apply dielectric grease directly to the wire bends and contact points—just a touch.

Thock—the sound we all chase—isn’t just about stabs. It’s a combo of lubed stabilizers, the right switches, a dampened case, and good keycaps. But the stabs are the base of the pyramid. If they’re off, everything else falls apart.

Try different lubes too. Thick lubes like Krytox 205g0 are great for stabilizers, but some folks prefer dielectric grease on the wire for extra dampening. Play around and trust your ears.

Every board sounds different. Even the same stabs in two builds can sound totally unique. That’s what makes this fun—you’re tuning your sound.

“Visual Sound Spectrum of Keyboard Stabilizer Sounds: Rattle, Tick, and Thock”

Img
“Making your stabs sound chef’s kiss.”

Fixing Issues After Installation

So, something’s not right. It happens. Honestly, even pro builders run into weird issues with stabilizers. Let’s fix them.

Issue: Sticky or uneven keys. First thing—check the stabilizer isn’t installed crooked or partially popped out. Next, check the wire—it may be bent unevenly. Pull it, inspect, rebend if needed, and reinstall.

Issue: Key doesn’t bottom out cleanly. You might have over-lubed the stem or the wire, especially with thick greases. Pop it open, clean it gently, and re-lube with a lighter hand.

Issue: Phantom rattle or ping. This can come from loose screws, a dry wire, or even the switch housing itself. Try tightening the screw gently. If that fails, tape mod the PCB contact point, or even try swapping switches to isolate the issue.

Issue: Keypress sounds better when pressed on one side. That’s a sign of wire imbalance. Remove it, bend the wire just slightly toward the weak side, reinstall, and test again.

In short: don’t panic. Every issue has a fix, and part of this hobby is learning by doing—and redoing. The more builds you do, the easier this gets.

Img
“Before you call it done: a stabilizer checklist.”

Is It Worth the Effort?

Here’s the deal—you don’t have to install Durock stabilizers. Your keyboard won’t explode without them. But after doing it once, it’s kinda hard to go back.

Installing and tuning stabs is one of those things that feels overwhelming at first, but becomes second nature. You start to feel what ‘good’ stabilizers are like. You hear the difference. You feel the difference.

Is it time-consuming? Yeah, especially your first time. You’ll fumble screws, second-guess your lube, maybe redo a few installs. But when you hit that first spacebar and it goes thock with no rattle? Game over. You’re hooked.

It’s a project. But it’s a rewarding one. Like fixing a car door that never closed quite right. Or finally getting rid of that squeaky cabinet hinge. It’s one of those upgrades that feels small until you live with it for a while. Then you wonder how you ever typed without it.

Img
“Bye-bye rattle, hello thock!”

Performance Boost vs. Time Spent

Let’s weigh it honestly. You’ll spend 1 to 2 hours installing and tuning Durock stabilizers on your first go—maybe longer if you’re deep in modding land. So… is it worth it?

In a word: yes.

That little investment of time gives you better sound, smoother typing, and less annoyance every time you touch your keyboard. That’s thousands of keystrokes a day feeling better. Imagine the payoff over months or years.

And once you get the hang of it, future installs are way faster. Like any skill, it compounds.

If you’re building your own board? 100% do it. If you’re upgrading a prebuilt and want a taste of the custom world without diving all the way in? Still worth it. Just make sure your board supports PCB mount stabilizers before you order.

Img
“The more you mod, the happier your fingers! ⌨️😊”

Would I Recommend It?

Honestly? Yep. I’d recommend it even if you’re not a full-blown keyboard nerd yet. Because once you feel the difference, you’ll understand why people obsess over this stuff.

It’s not just about sound or smoothness—it’s about control. Taking a cheap or midrange board and making it yours. Durock stabilizers are a great entry point into that journey.

So if you’ve got the curiosity, the tools, and a free afternoon… go for it. Worst case, you learn something new. Best case? You unlock a level of typing bliss you didn’t know you were missing.

And hey—if it all goes sideways, I’m right here. We’ll fix it together.

Img
“Hand-tuned for maximum typing pleasure.”

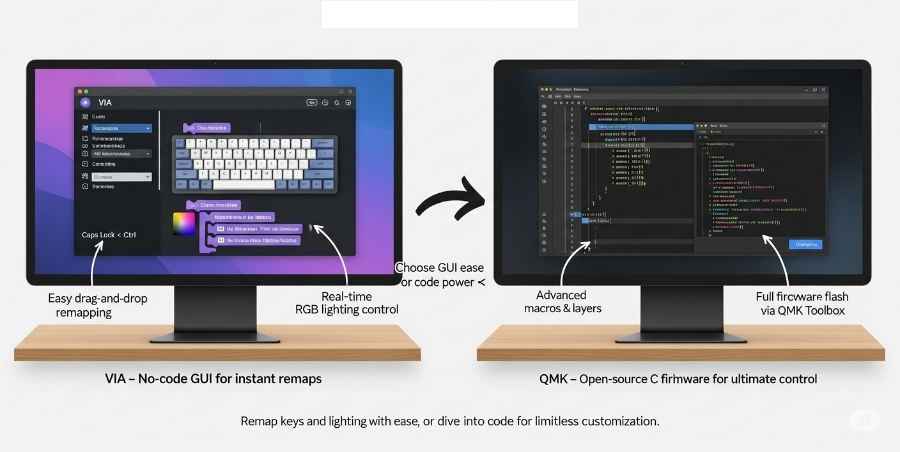
Curious how you can supercharge your keyboard’s firmware? Explore our breakdown of What are VIA and QMK for Mechanical Keyboards?.

Leave a Reply